Organizing your WooCommerce store efficiently is crucial for providing a seamless shopping experience for your customers. Product categories and tags are two powerful tools that help you categorize and filter your products, making it easier for customers to find what they’re looking for. In this guide, we’ll explore what product categories and tags are in WooCommerce and how to use them to enhance your store’s organization and navigation.
Video version:
Step 1: Understanding Product Categories
Product categories in WooCommerce are hierarchical groupings that allow you to organize products into broader groups. They help customers navigate through your store by providing a structured way to browse products.
For example, if you run an online clothing store, you might have categories like “Men,” “Women,” “Kids,” “Accessories,” etc. Each of these categories can have subcategories, such as “Dresses” under “Women” or “Shirts” under “Men.”
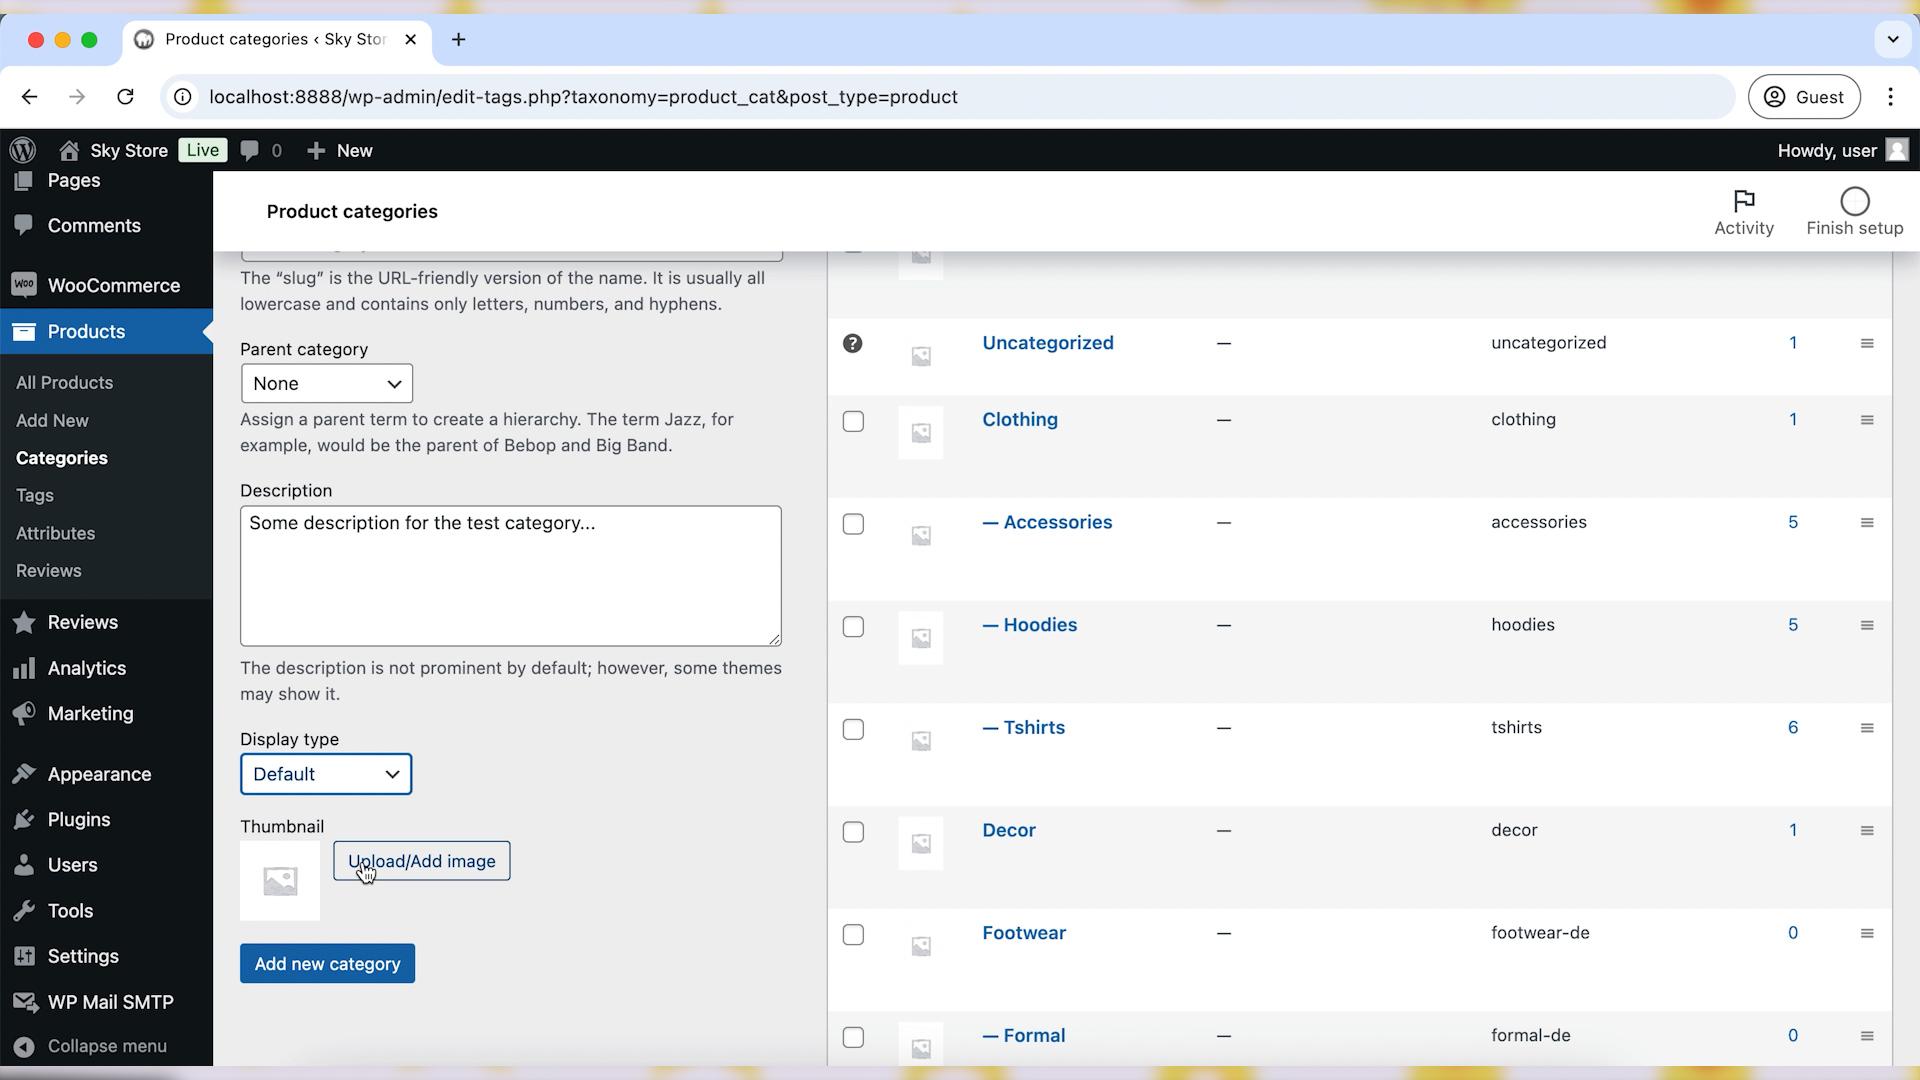
Step 2: Creating Product Categories
Navigate to “Products” > “Categories.”
Enter the name of the category in the “Name” field.
Optionally, enter a “Slug” (URL-friendly version of the name).
Choose a parent category if this category is a subcategory.
Enter a description if needed.
Click “Add New Category.”
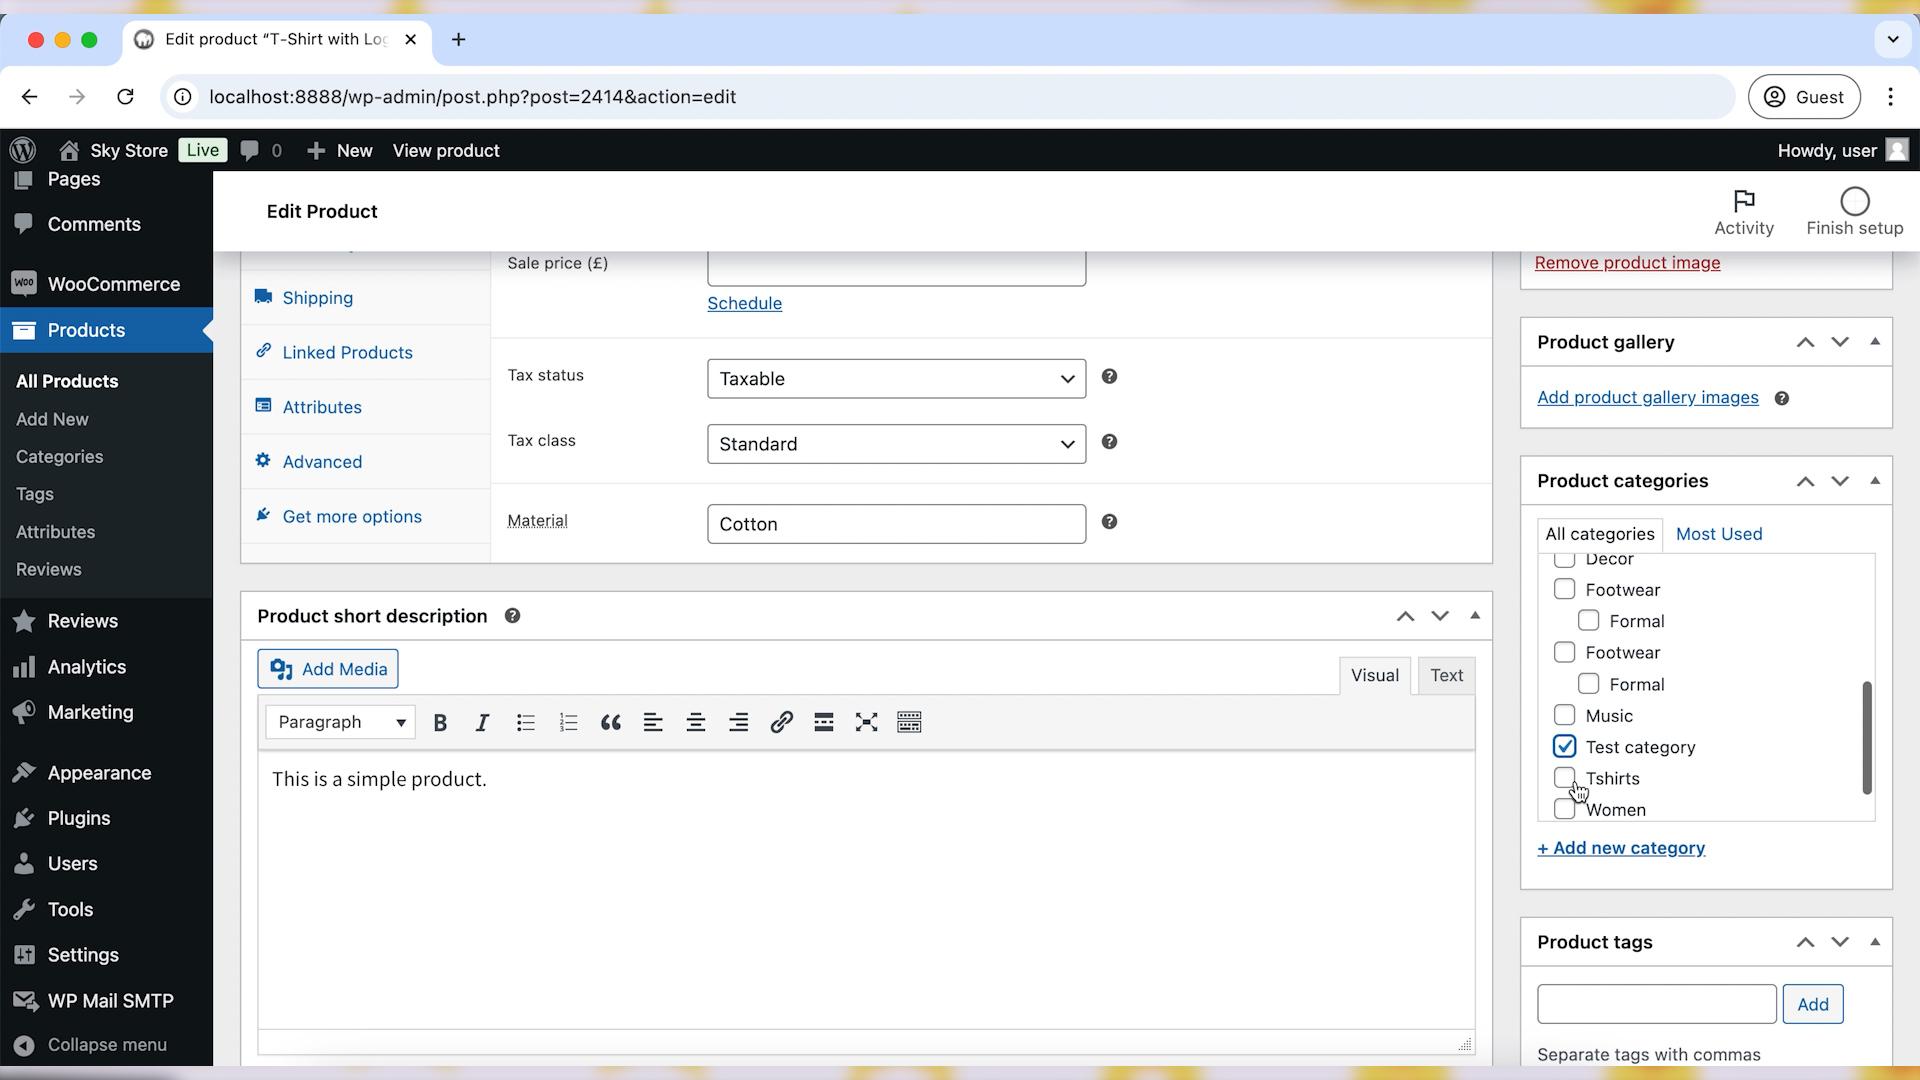
Step 3: Assigning Products to Categories
Now, let’s see how to assign a category to a product. When adding or editing a product, scroll down to the “Product Categories” section. Check the box next to the category (or categories) you want to assign to the product. After that, click on the “Update” button to save your changes.
Step 4: Understanding Product Tags
Product tags in WooCommerce are non-hierarchical keywords or phrases that describe specific attributes of products. Tags provide additional filtering options and help customers find products with similar features.
If you sell electronics, you might use tags like “4K,” “Bluetooth,” “Wireless,” etc. These tags help customers filter products based on specific features they are interested in.
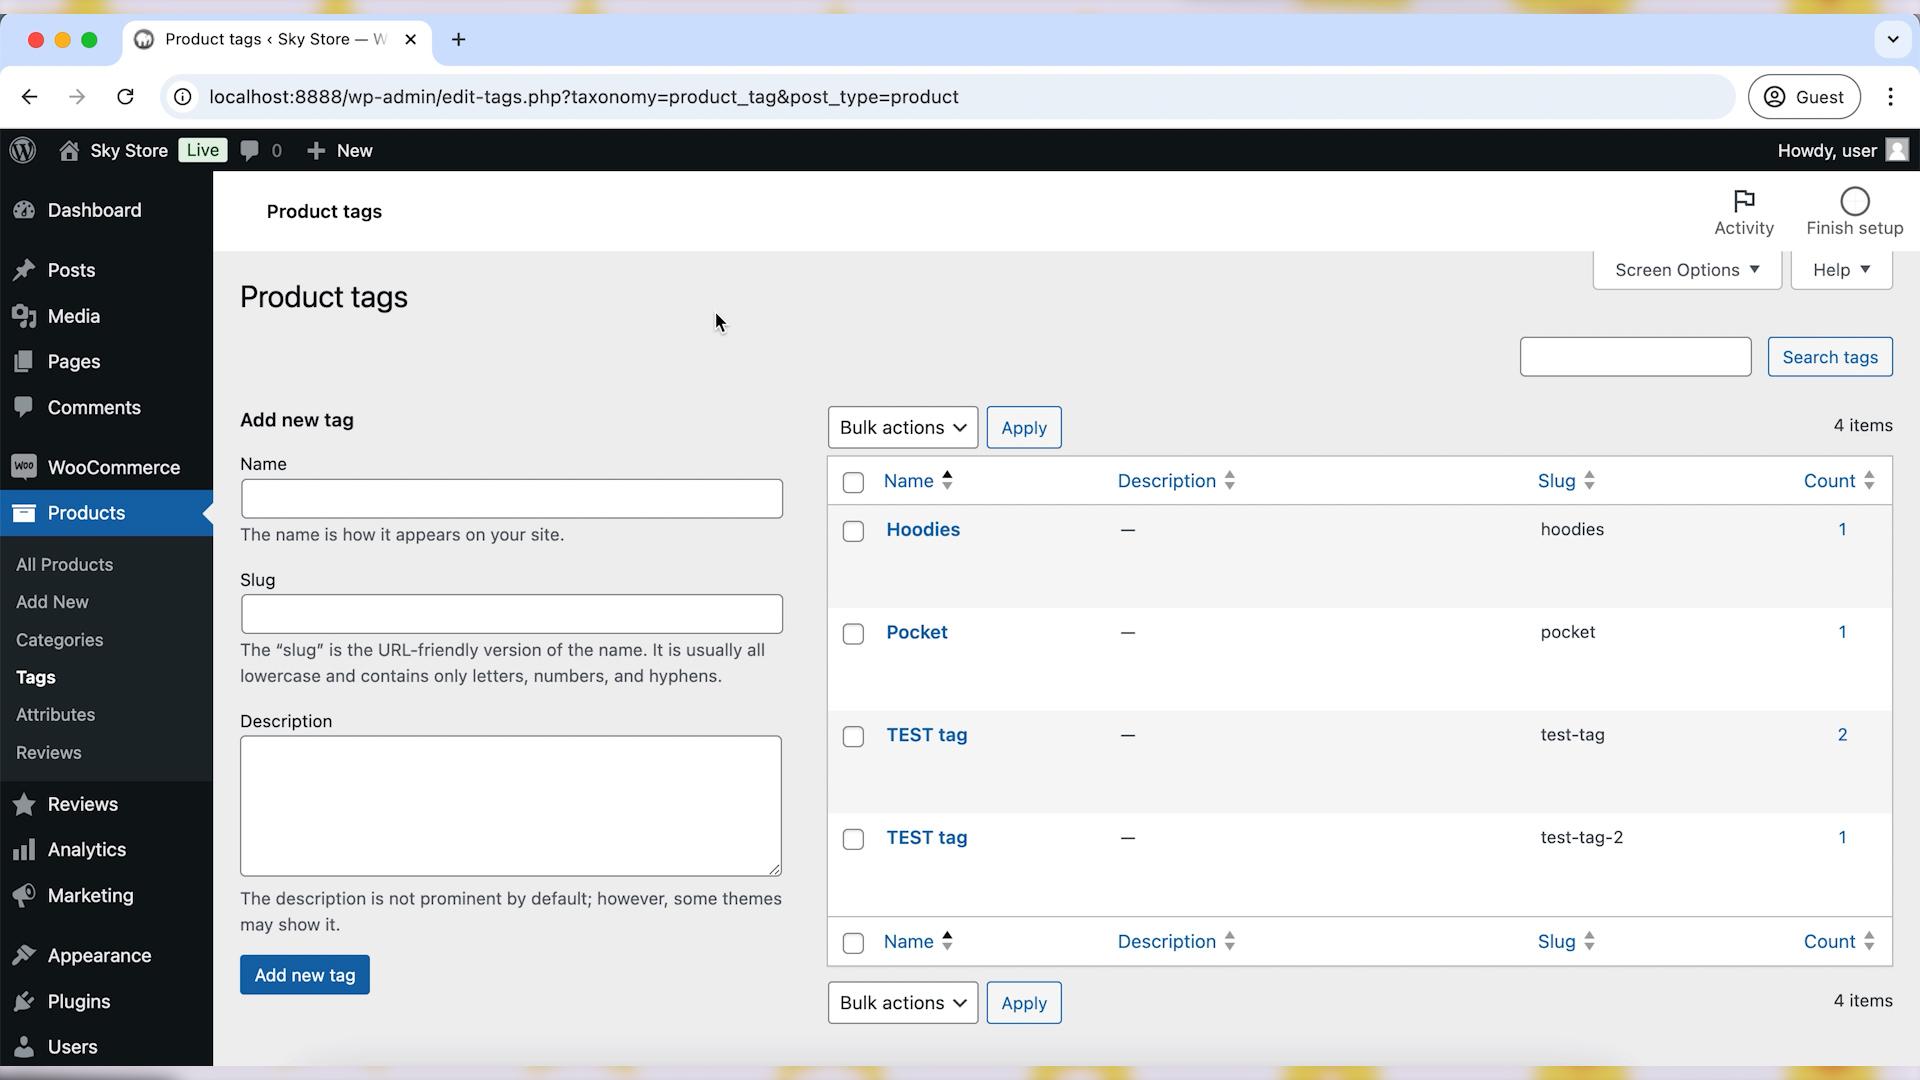
Step 5: Creating Product Tags
Navigate to “Products” > “Tags.”
Enter the name of the tag in the “Name” field.
Optionally, enter a “Slug” (URL-friendly version of the name).
Enter a description if needed.
Click “Add New Tag.”
Step 6: Assigning Products to Tags
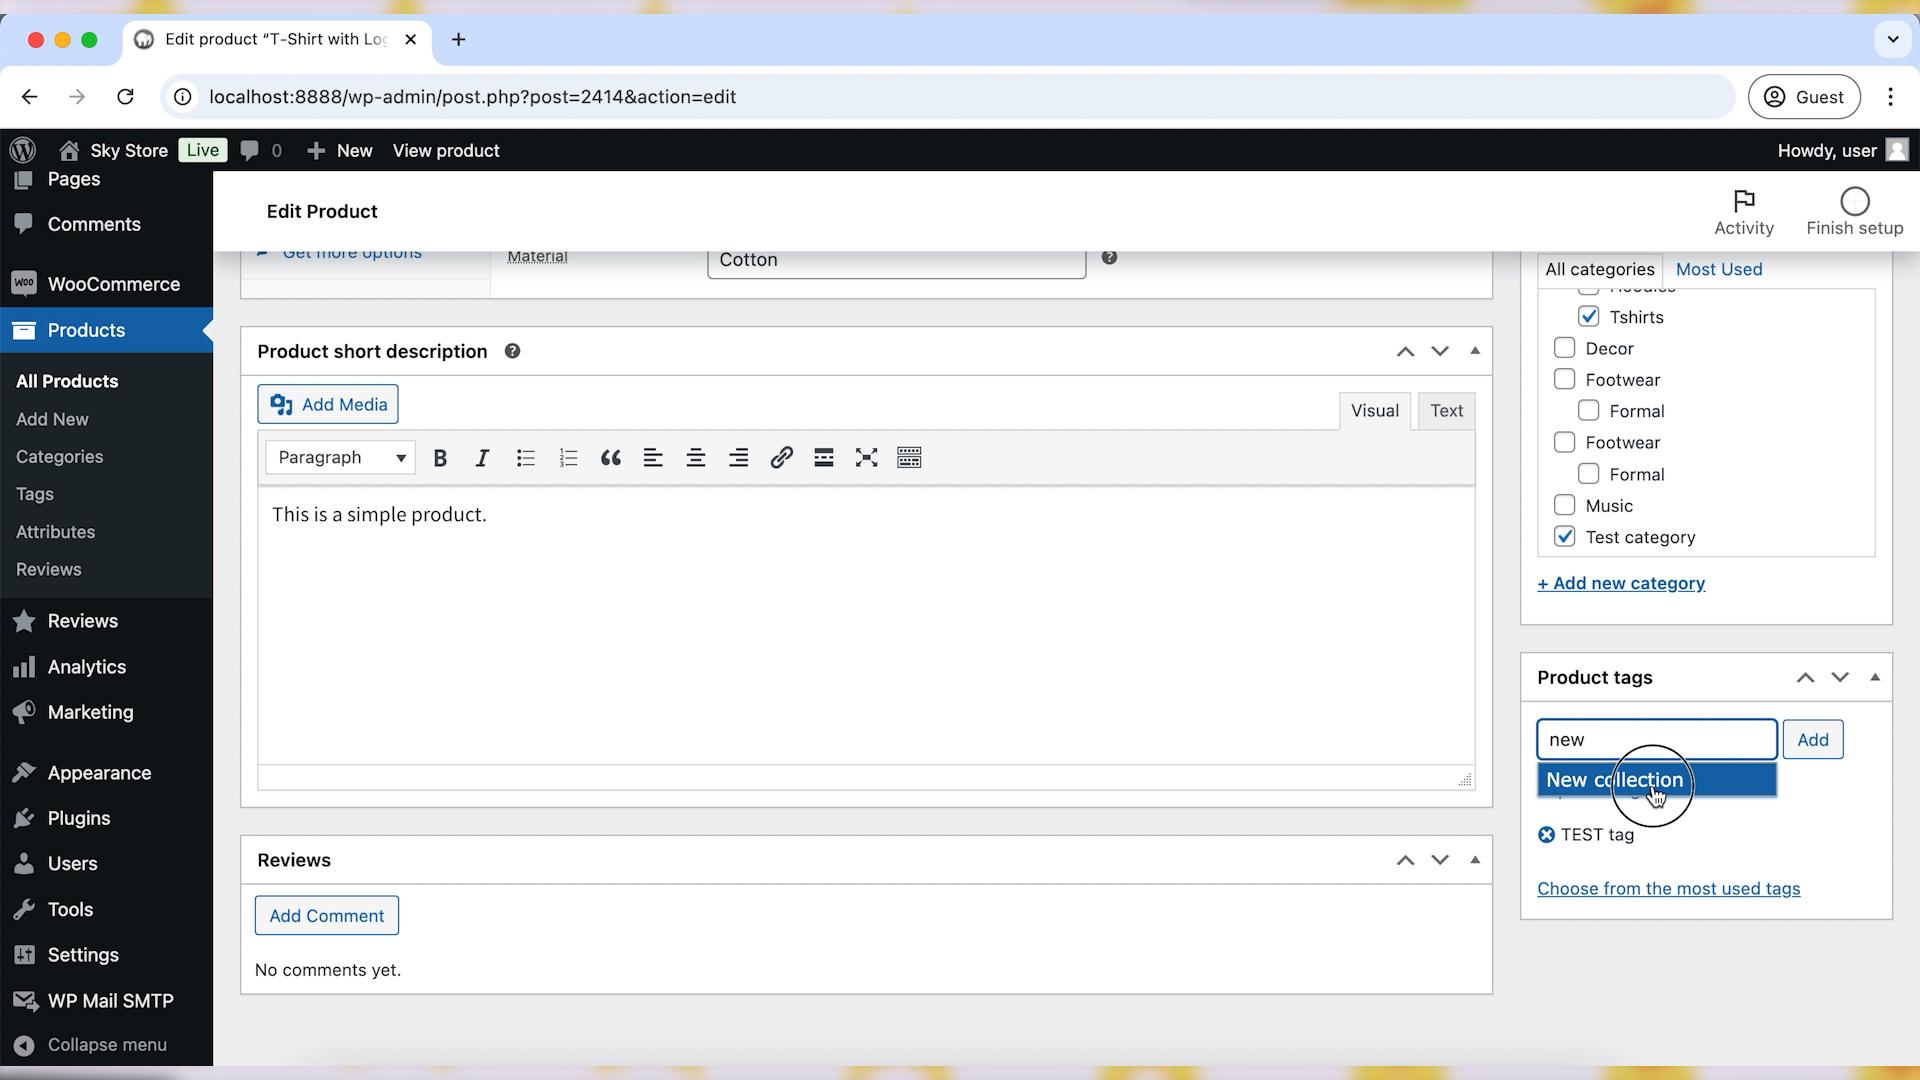
Now, let’s see how to assign a tag to a product. When adding or editing a product, scroll down to the “Product Tags” section. Enter the tags you want to assign to the product. You can add multiple tags separated by commas. After that, click on the “Update” button to save your changes.
Wrapping up
By effectively using product categories and tags in WooCommerce, you can significantly enhance the organization and navigability of your online store. Categories provide a hierarchical structure that helps customers find broad groups of products, while tags offer a flexible way to filter and find specific attributes. Together, they improve the overall shopping experience, making it easier for customers to discover and purchase products. Happy organizing!

