Incorporating PayPal into your WooCommerce store is a key strategy to offer customers a familiar and secure payment option. In this guide, we’ll walk you through the steps of setting up PayPal in WooCommerce, ensuring a seamless payment experience for your customers.
Video version:
Step 1: Set Up a PayPal Business Account
You will not be able to accept PayPal in your WooCommerce shop unless you have a PayPal account for business. If you don’t have one, create a PayPal business account on the PayPal website. It is free. Complete the necessary verification steps for your business account.
Step 2: Add PayPal to WooCommerce
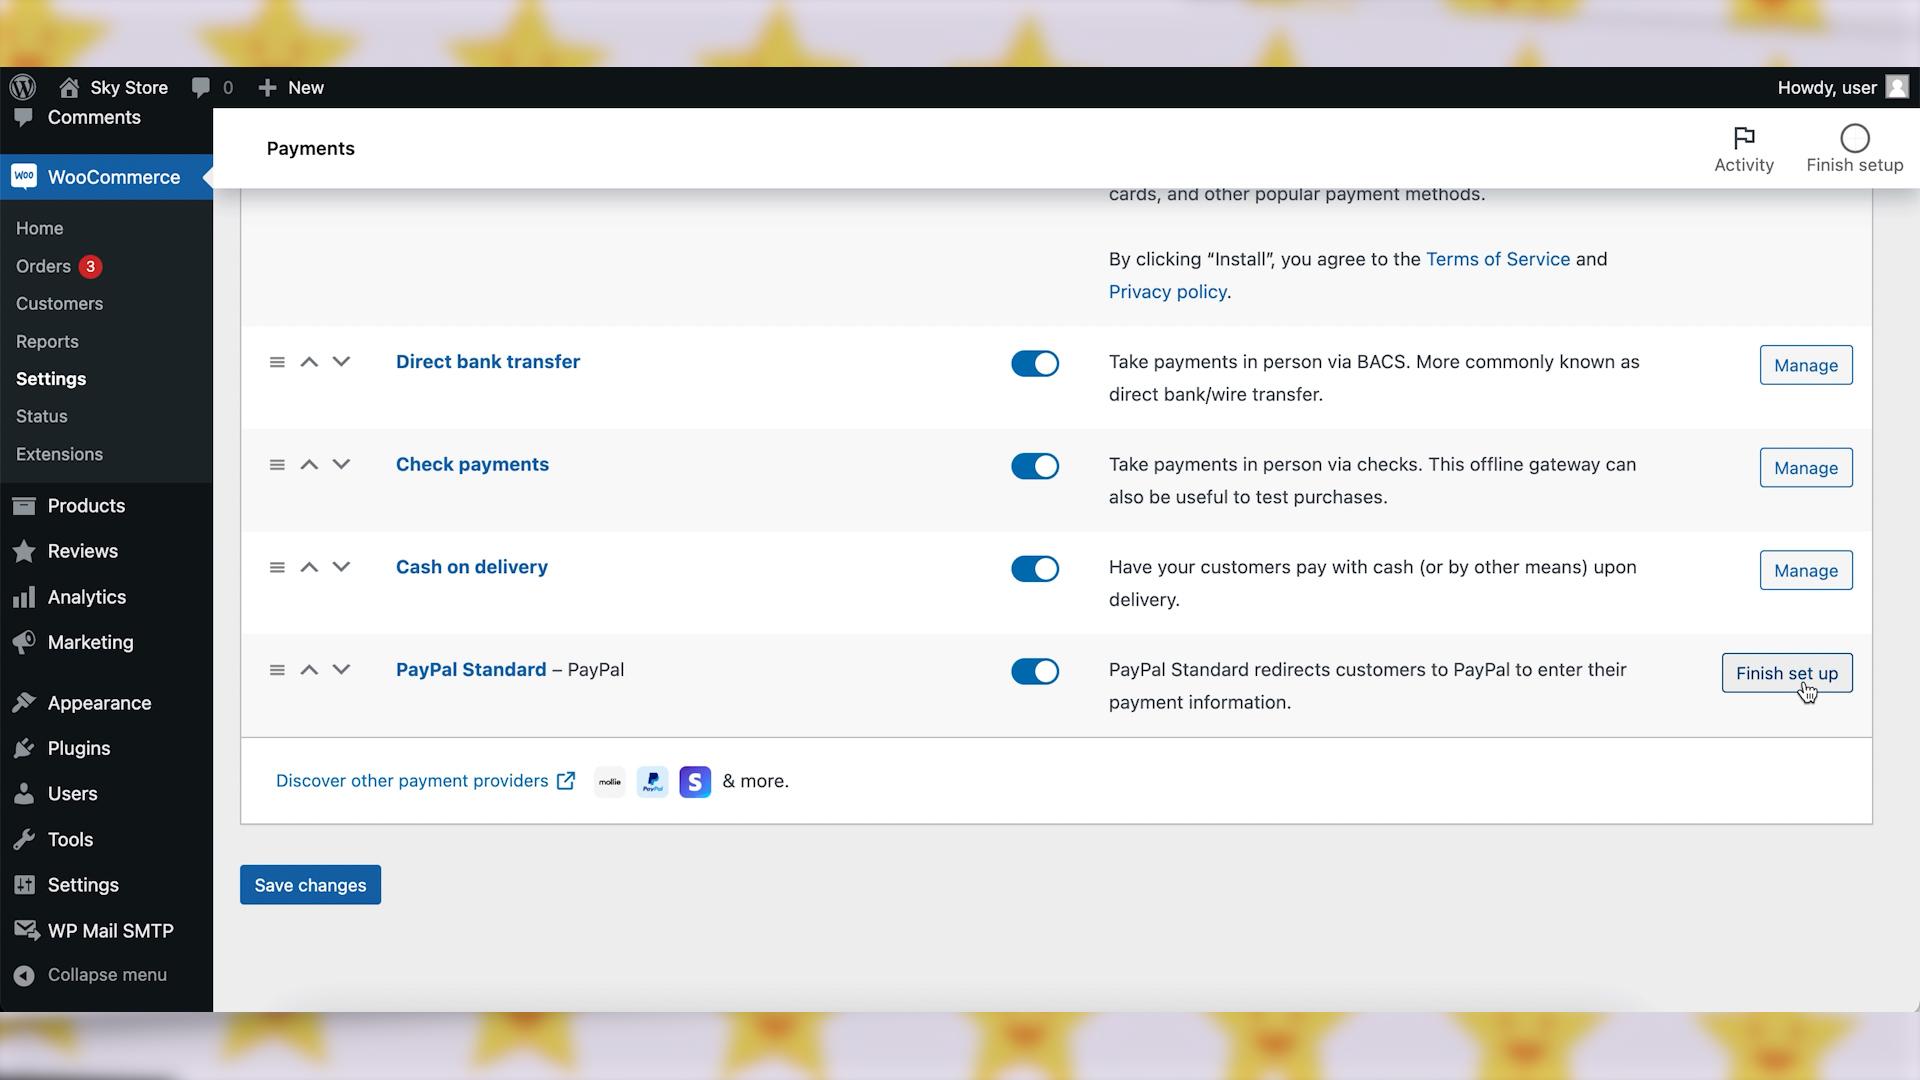
In your WordPress dashboard, go to “WooCommerce”, then “Settings.” Click on the “Payments” tab. Enable “PayPal Standard” and click “Finish set up” or “Manage”. 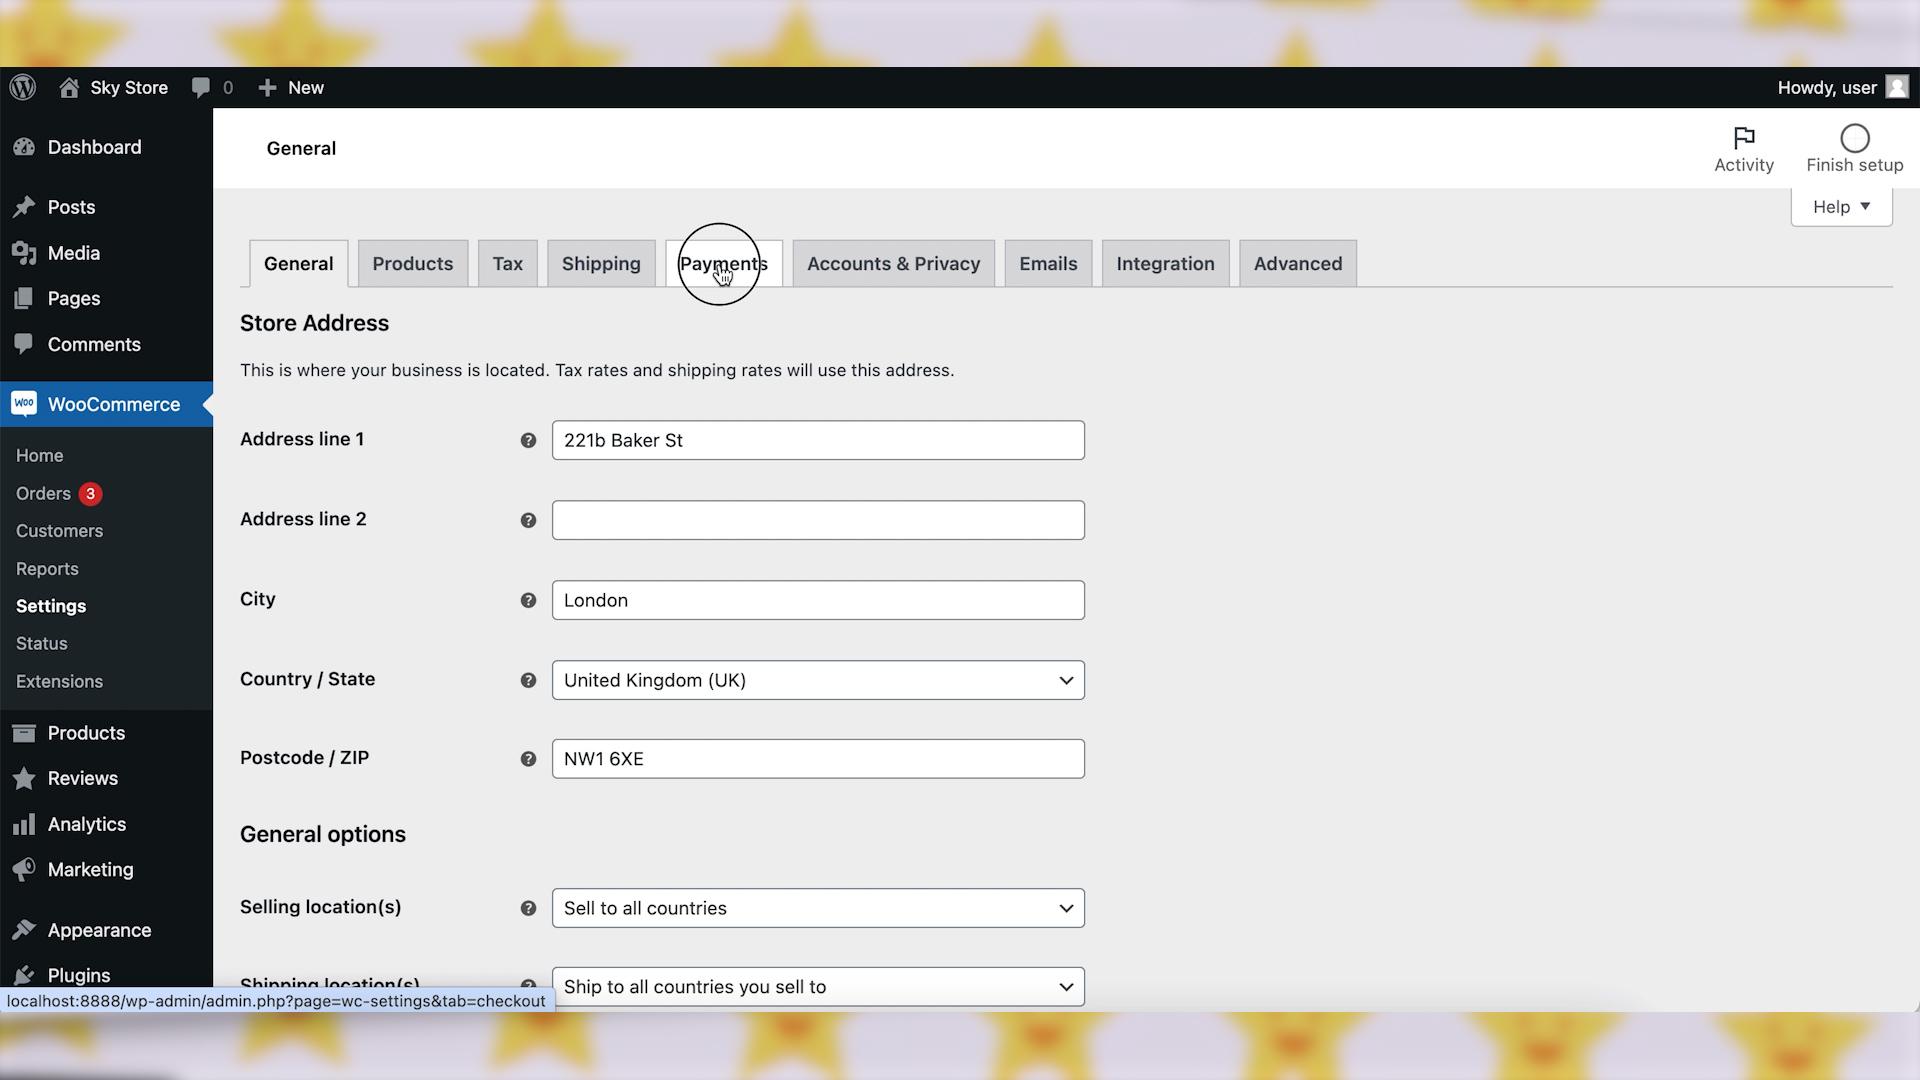
Step 3: Configure PayPal Settings
Enter your PayPal email address associated with your business account. Customize the title and description for the PayPal payment option shown on the checkout page.
Optionally, you can also enable the PayPal Sandbox setting for testing. 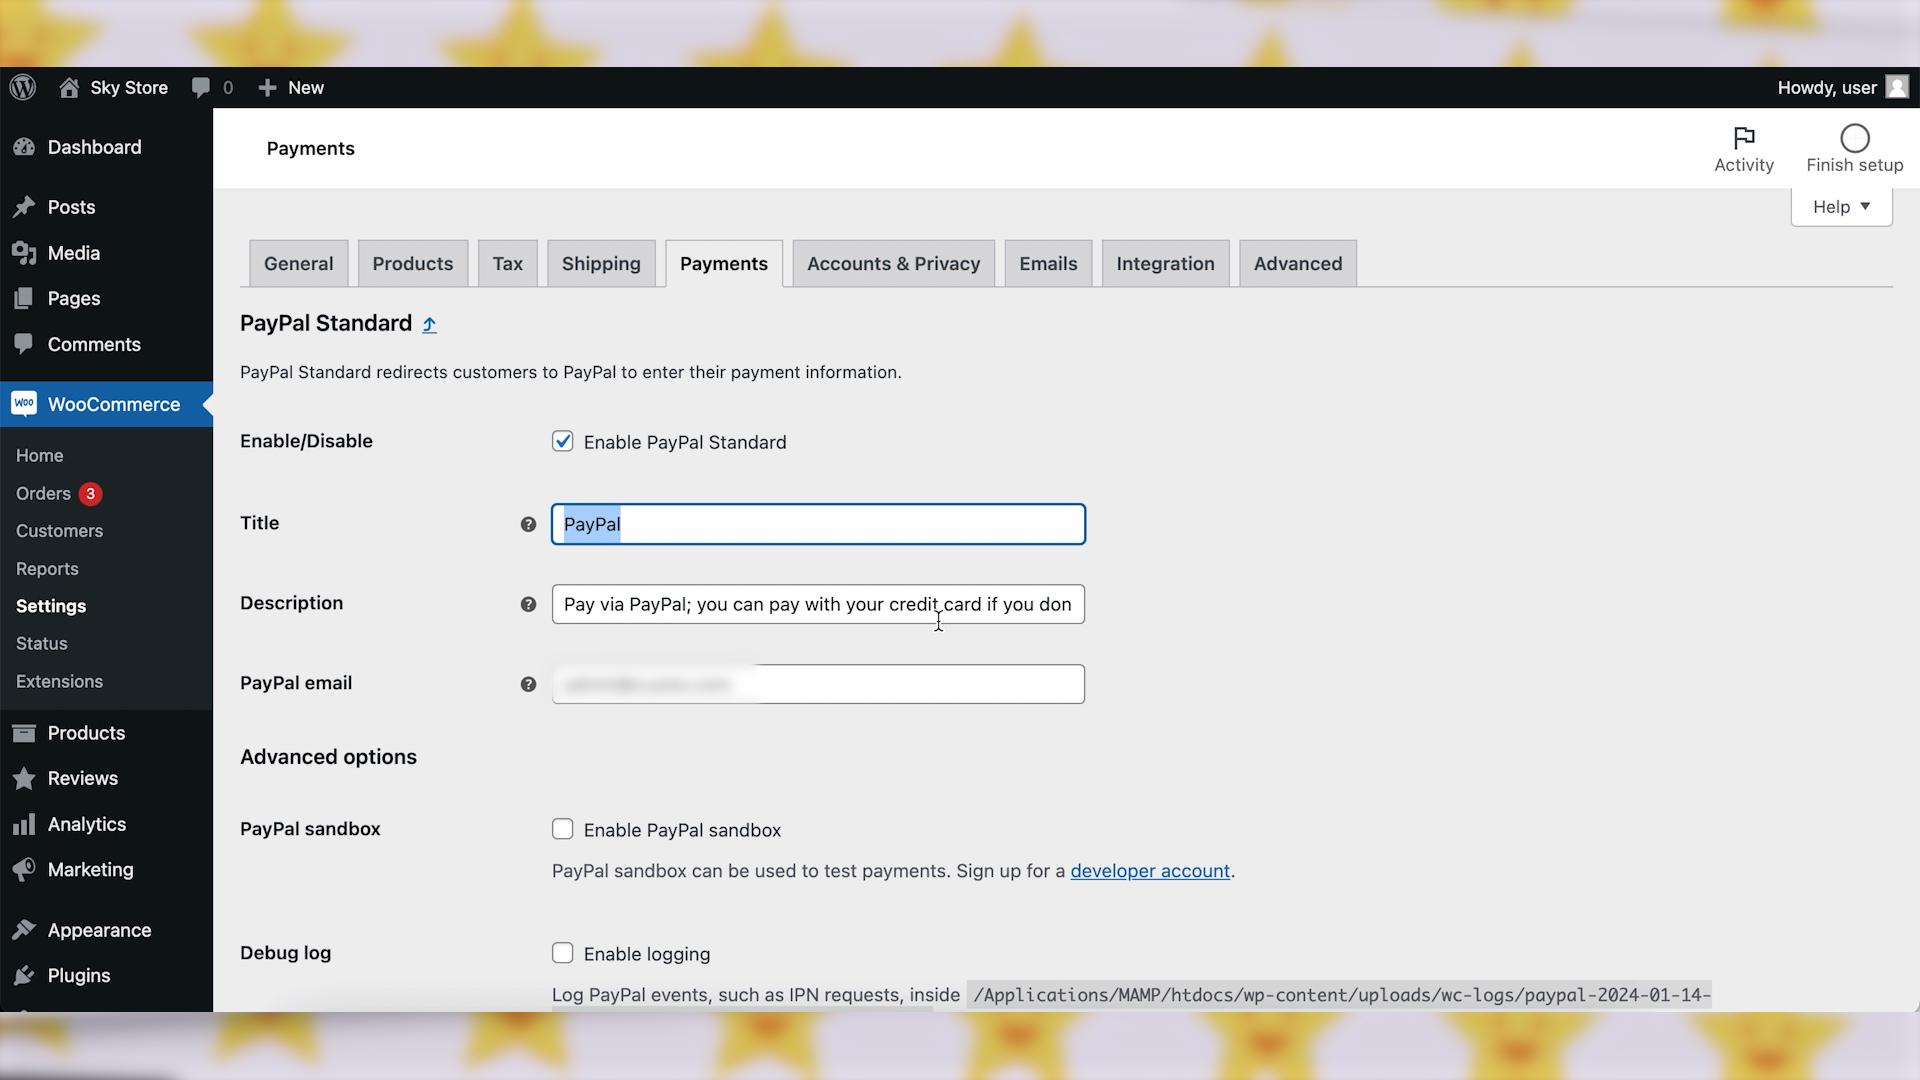
Step 4: Set API Credentials (Optional)
If you plan to use features like automated refunds, you will need to set up API credentials. This step depends on your specific requirements as you can also issue refunds manually from your PayPal account. In any case, don’t forget to click on “Save changes” button to apply your PayPal settings. 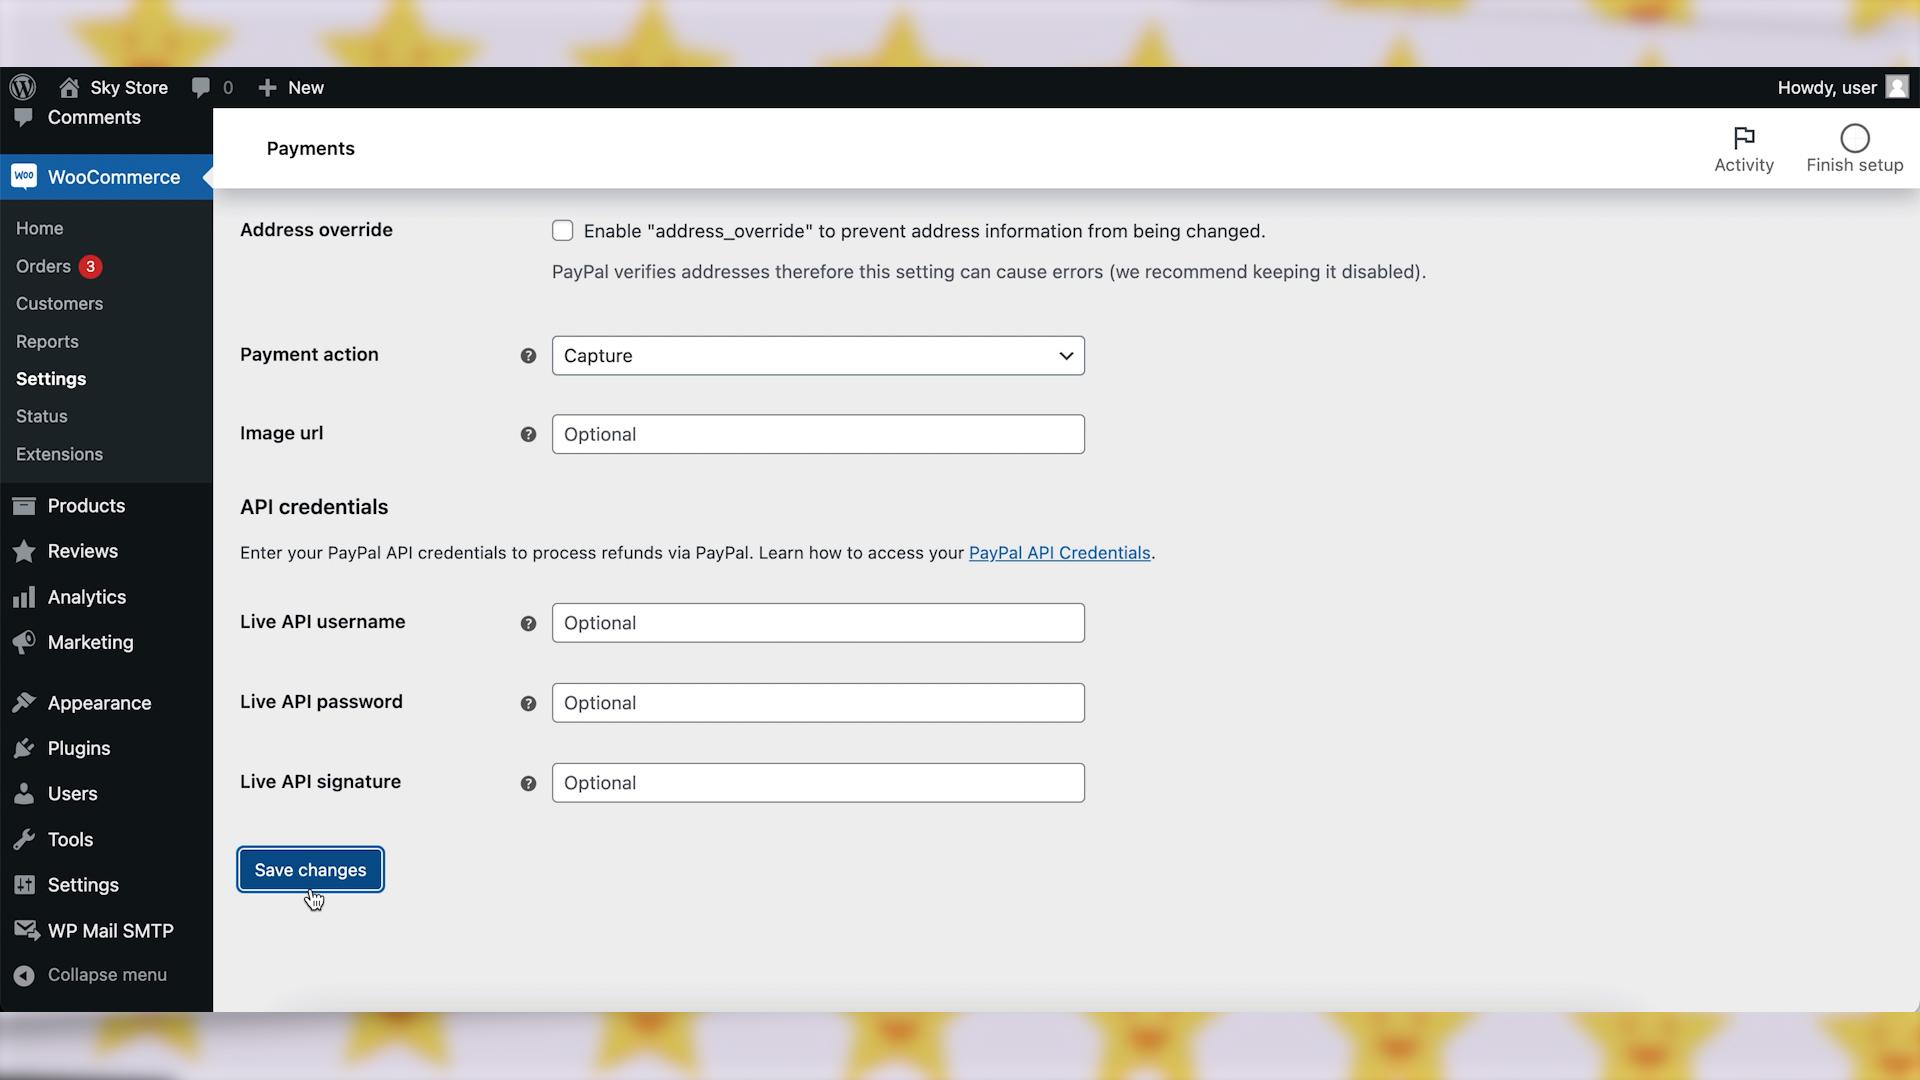
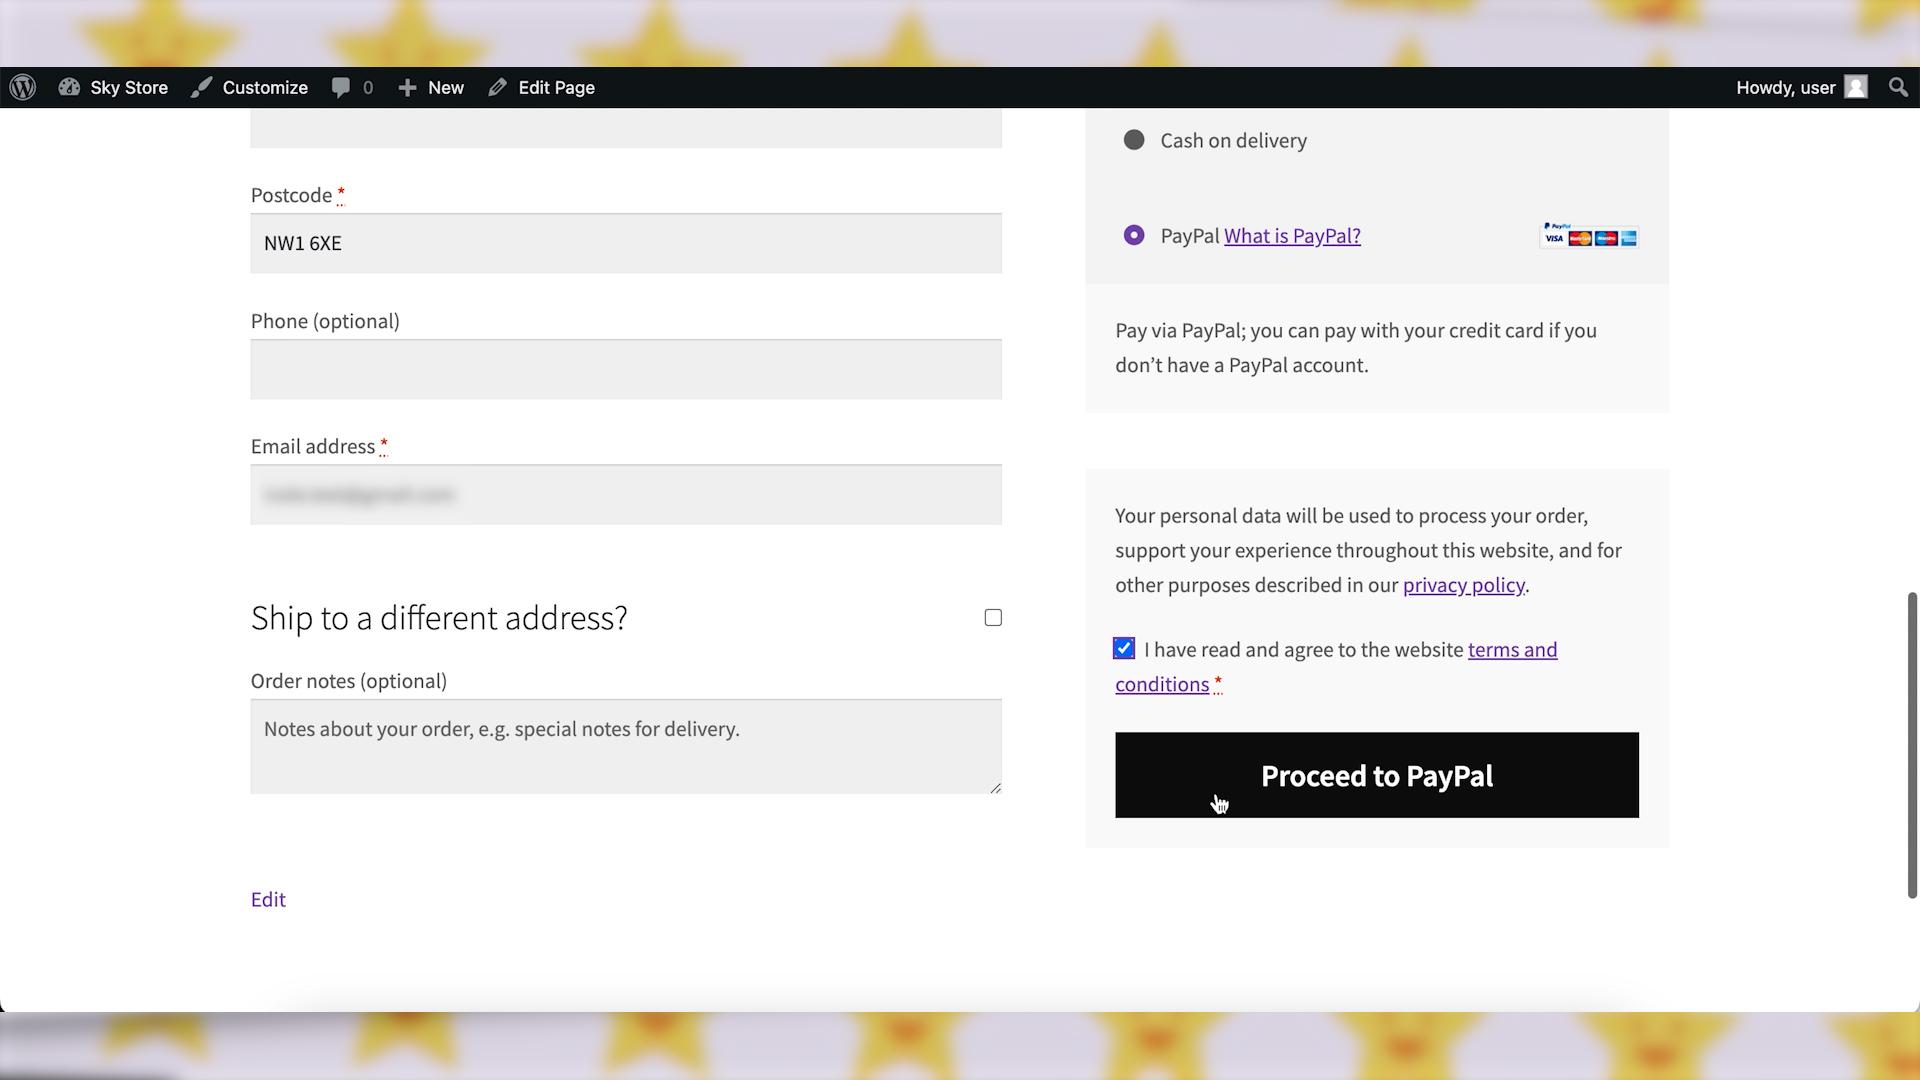
Step 5: Test PayPal Transactions
It’s always a good idea to test the integration to ensure everything is working correctly. You can do this by placing a test order on your site using PayPal as the payment method.
Wrapping up
That’s it! Your WooCommerce store should now be set up to accept payments through PayPal. You’ve successfully integrated PayPal into your WooCommerce store, providing customers with a reliable and widely trusted payment option. Happy selling!

