
Before an official public launch of your Woo shop, sometimes it’s handy to do some initial setup on your personal computer. You can do this by turning your computer into a web server and running WordPress and Woo from there. In this article, I will discuss this process and how to test WooCommerce locally. More than that though, I will explain how you can test this local install on different devices on your network and from the global Web.
Table of Contents:
- Installing a PHP Web Server on Your Local Computer
- Getting WordPress and WooCommerce Up and Running
- Making it so WordPress Uses Relative URLs
- Creating a Temporary Public URL to Test WooCommerce
Installing a PHP Web Server on Your Local Computer
WordPress core is built using the PHP programming language so it needs a PHP server to run. Sure, it’s also loaded with a bunch of HTML, CSS, and JavaScript. But, without a PHP server to run on, WordPress simply won’t work.
Most of the time we can use WordPress and WooCommerce without having to know that PHP is lurking behind the scenes. And that is one of the wonderful things about WordPress. It adds layers of abstraction to the bits and bytes and pixels that make up our websites. But, when we want the luxury of tinkering with it locally, at least knowing that PHP is needed can set you in the right direction.

There are a Variety of Free and Paid Tools Available for Installing a PHP Server
There are a wide variety of ways to get a PHP server running on your local machine, regardless of the Operating System. Some solutions are even built specifically for WordPress users. ServerPress has one such example. Local is yet another.
I have worked with several of the tools for installing a PHP server. The steps that follow may work without modification for use with any of them. Recently I have been using XAMPP for local testing, so I will discuss the process assuming XAMPP is also in use on your side. But like I said, it is general enough in nature that it may work the same even when using Local, ServerPress, or others.
By the way, I think that XAMPP is pronounced ZAMP, but it might be Ex-AMP, not sure.
There are Links to Steps for Installing XAMPP on the Same Page as the Download
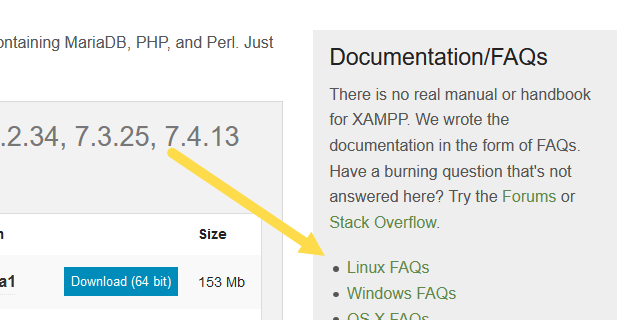
To install XAMPP, visit the link above. There will be a download available for all of Windows, Mac, and Linux. There are also links to FAQs for each Operating System. In the FAQs, you will see the steps for installation. There isn’t much sense in me repeating them here I suppose.
You will also see the mention of Bitnami. This can be used to make the installation of WordPress easier for you. I personally do it the manual way so I will explain that process below.
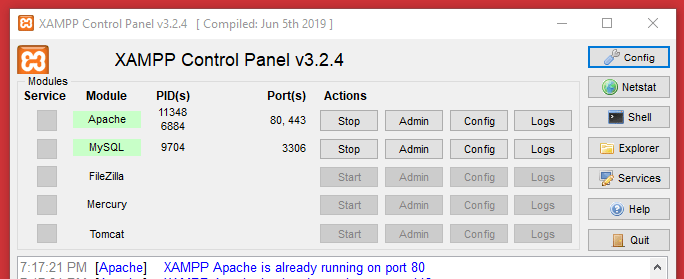
One quick note: there are 5 different modules available when installing XAMPP. Apache and MySQL are all that is needed for getting WordPress and Woo working. So, installing FileZilla, Mercury and Tomcat are optional.
Getting WordPress and WooCommerce Up and Running
These steps are certainly specific to XAMPP (without Bitnami). The other tools mentioned will install WordPress for you (mind you, probably an old version of WordPress and with the entire history of default WordPress themes installed, but hey).
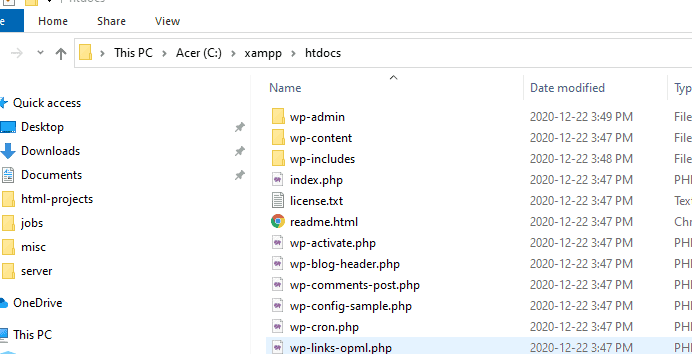
By default, on Windows at least, XAMPP installs into C:\xampp\. The folder htdocs in there will be the root of the website that localhost points to. That’s the directory where WordPress can be installed.
A Quick Discussion About Keeping Multiple WordPress Installs Cleaner When Using XAMPP
It’s probably too much to get into for this short article, but if you plan to have multiple WordPress installs there is a cleaner way to do it. Here is a quick example.
Say you have 3 sites… wootest1, woo-customer-reviews-test, and flower-shop.
You can create unique folders within htdocs, and also use local domains for each. So, rather than install WordPress in htdocs you can have folders that match the site names mentioned above. For this, you would not use localhost at all, and perhaps refer to the sites as http://wootest.dev, http://woo-customer-reviews-test.dev, and http://flower-shop.dev.
With that said though, the details of that are probably too much for this simple article. So let’s move on with installing WordPress and WooCommerce shall we?
Steps to Install WordPress and WooCommerce Locally
OK, with XAMPP installed, follow these steps below please:
- Download WordPress from the official WordPress.org site.
- Unzip it into the
htdocsfolder that XAMPP created for you. The extraction will create a folder called “wordpress” with the version number tacked on. In that will be a folder called “wordpress”. It’s the files in that final “wordpress” folder that you want to copy over tohtdocs. - Launch XAMPP, start Apache and MySQL.
- Click the Admin button for MySQL. This should probably bring you over to
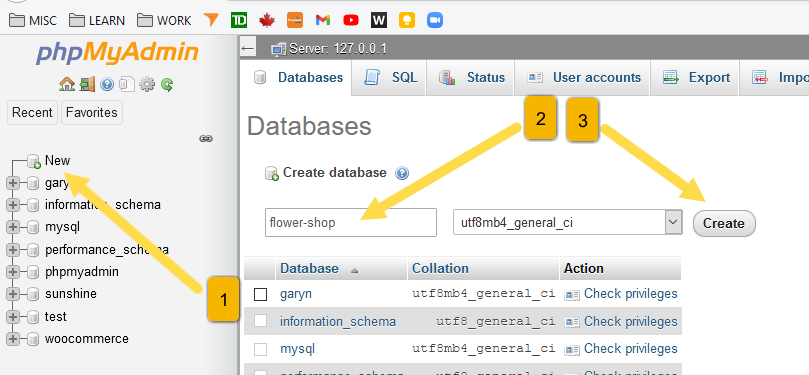
localhost/phpmyadmin/. I hope so. - Click New on the left, add a name in the Database Name text box, then click Create. Make note of the Database Name, you will need it shortly.
- You may now close the Tab that phpMyAdmin launched in. Keep XAMPP running though.
- Next, open
C:\xampp\htdocs\wp-config-sample.phpin a plain text editor. - Edit the DB_NAME value with your database name, something like
define( 'DB_NAME', 'flower-shop' ). - For now, the DB_USER is probably
root, and DB_PASSWORD is empty likedefine( 'DB_PASSWORD', '' ). - Use
localhostfor DB_HOST. - Save the file and then rename it to
wp-config.phpby removing the-sampleportion.
That should do it. The database is created, and WordPress will be aware of it during installation because of the edits made to the WP Config file. Cool. Now, in your browser head to http://localhost/ and follow the steps to configure WordPress. This is essentially the installation of WordPress. The previous steps just brought the files in place.
From there, of course, get WooCommerce installed from the Plugins screen. Plus install any other plugins you are wanting to test with. Test gradually though would be my advice.
Making it so WordPress Uses Relative URLs
WordPress should work just fine for you as-is. You can likely browse to it from the same machine you have the server software installed on. And everything probably looks as expected on the front end.
However, if you want to test your WooCommerce installation on other devices on the same network, or share the link with others to visit from the Web, WordPress will get a little funky.
Relative vs Absolute URLs for Local Testing
You could set up host files on machines on your local network, or browse to the site by using the name of the machine the server is on. That may work for you. It might just be a matter of tinkering with some permission settings in the firewall. I can’t be sure. It’s hardly ever the exact same situation.
A simpler way I feel is by creating a tunnel to the site and giving it a temporary public domain name. This process is explained in the next section. The issue with this though is that WordPress uses a lot of absolute URLs. Meaning… if your local site address is http://flower-shop.dev/, when we change the domain name to a public one, things start to break.
The solution is to change all URLs to relative, so links like http://flower-shop.dev/wp-content/themes/storefront/style.css simply become /wp-content/themes/storefront/style.css making the domain name less relevant in this scenario.
Adding Some Code to Switch WordPress to Use Relative URLs
We’re going a bit out of order here because this code to force WordPress to use relative URLs is only relevant after following the steps in the next section. I am doing it this way though to hopefully save you from the disheartening feeling of seeing your site collapse to HTML without any styling.
This step does involve adding some code. I created a post in the past about creating a plugin when writing custom code. So, if you want to you can give that a quick look. Another quick way to add some code is by using this pretty cool Code Snippets plugin.
Here is a link to the code that I use to fix the Absolute URL issue:
WP-Ngrok-Local.
What is NGrok Local for WordPress?
NGrok Local is an old repository on Github but it works. It looks to see if NGrok is in use, and if so, changes WordPress to use relative URLs. NGrok is the tool I will get you to install in the section below. It is what will make it so that your local WooCommerce test site gets the temporary public domain that tunnels to your computer.
The PHP code at the link above can be added as a code snippet in WordPress, or as a plugin, it’s up to you. It’s meant to just be used locally for testing when using NGrok.
Creating a Temporary Public URL to Test WooCommerce
With all the previous steps complete, even if adding the NGrok code above, WordPress should behave as expected on your local machine. Now, we will give it a publicly accessible URL so it’s easier to view on other devices on your network, as well as on the Web. This is handy for public sharing, testing on mobile devices, etc.
At this point, you should install NGrok on your computer. You need to create an account or else login using your Google or Github account if desired.
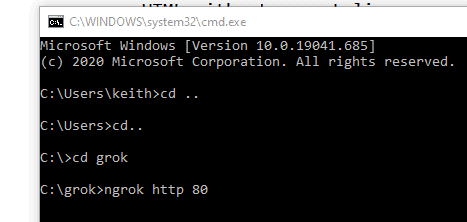
The download will be a zip file containing the ngrok executable. You can run it from anywhere that it sits on your computer really. It’s also handy to add it to the PATH so it can be launched from any folder in the Command-Line. I personally created a folder at C:\grok and copied the executable there.
Now, from the Command Prompt, you can go to that folder to run it. Below is a screenshot using CMD in Windows. In this example, it is not included in the PATH so I navigated to the C:\grok folder and typed ngrok http 80 to run it. I am assuming the default of Port 80 here.
Getting the NGrok Temporary URL for Public Use
NGrok will be aware of localhost and that’s where the public URL that it creates will tunnel to. There is a different command for using it with .dev local domains, but we didn’t cover that fully so I will leave that topic alone.
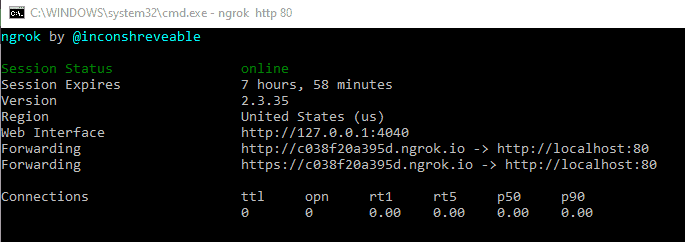
This will give you a grokked URL. You can see that in my example it is http://c038f20a395d.ngrok.io. Your Grok link should now point to your WordPress install from any device on the Internet or your local network. Close the Command Prompt and the tunneling stops.
Are You Getting a “Too Many Connections” Error?
This example demonstrates the use of Grok with the Free version. There are some limitations like the number of connections per minute. Understand that any web page that has links to images, CSS files, JavaScript, and the like contains multiple connections. Each link is a connection.
WordPress very often has many connections. This number grows depending on the plugins and theme in use. Therefore, you may very well expire the allotted number of connections per minute. It’s too much to get into here but it’s possible to inline CSS, etc to limit the connections. Also, you can choose a paid plan for Grok.
That’s it from me. Happy local testing!