
A wishlist feature can turn casual browsers into loyal customers by allowing them to curate a personalized list of their favorite products. In this guide, we’ll explore how to seamlessly create a wishlist in WooCommerce, providing an additional layer of convenience and engagement for your customers.
Video version:
Step 1: Install and Configure WooCommerce
If you haven’t installed WooCommerce yet, the first step is to install it. Log in to your WordPress admin dashboard. Navigate to “Plugins” and click “Add New.” Search for “WooCommerce,” install the plugin, and activate it. Follow the setup wizard to configure your basic store settings.
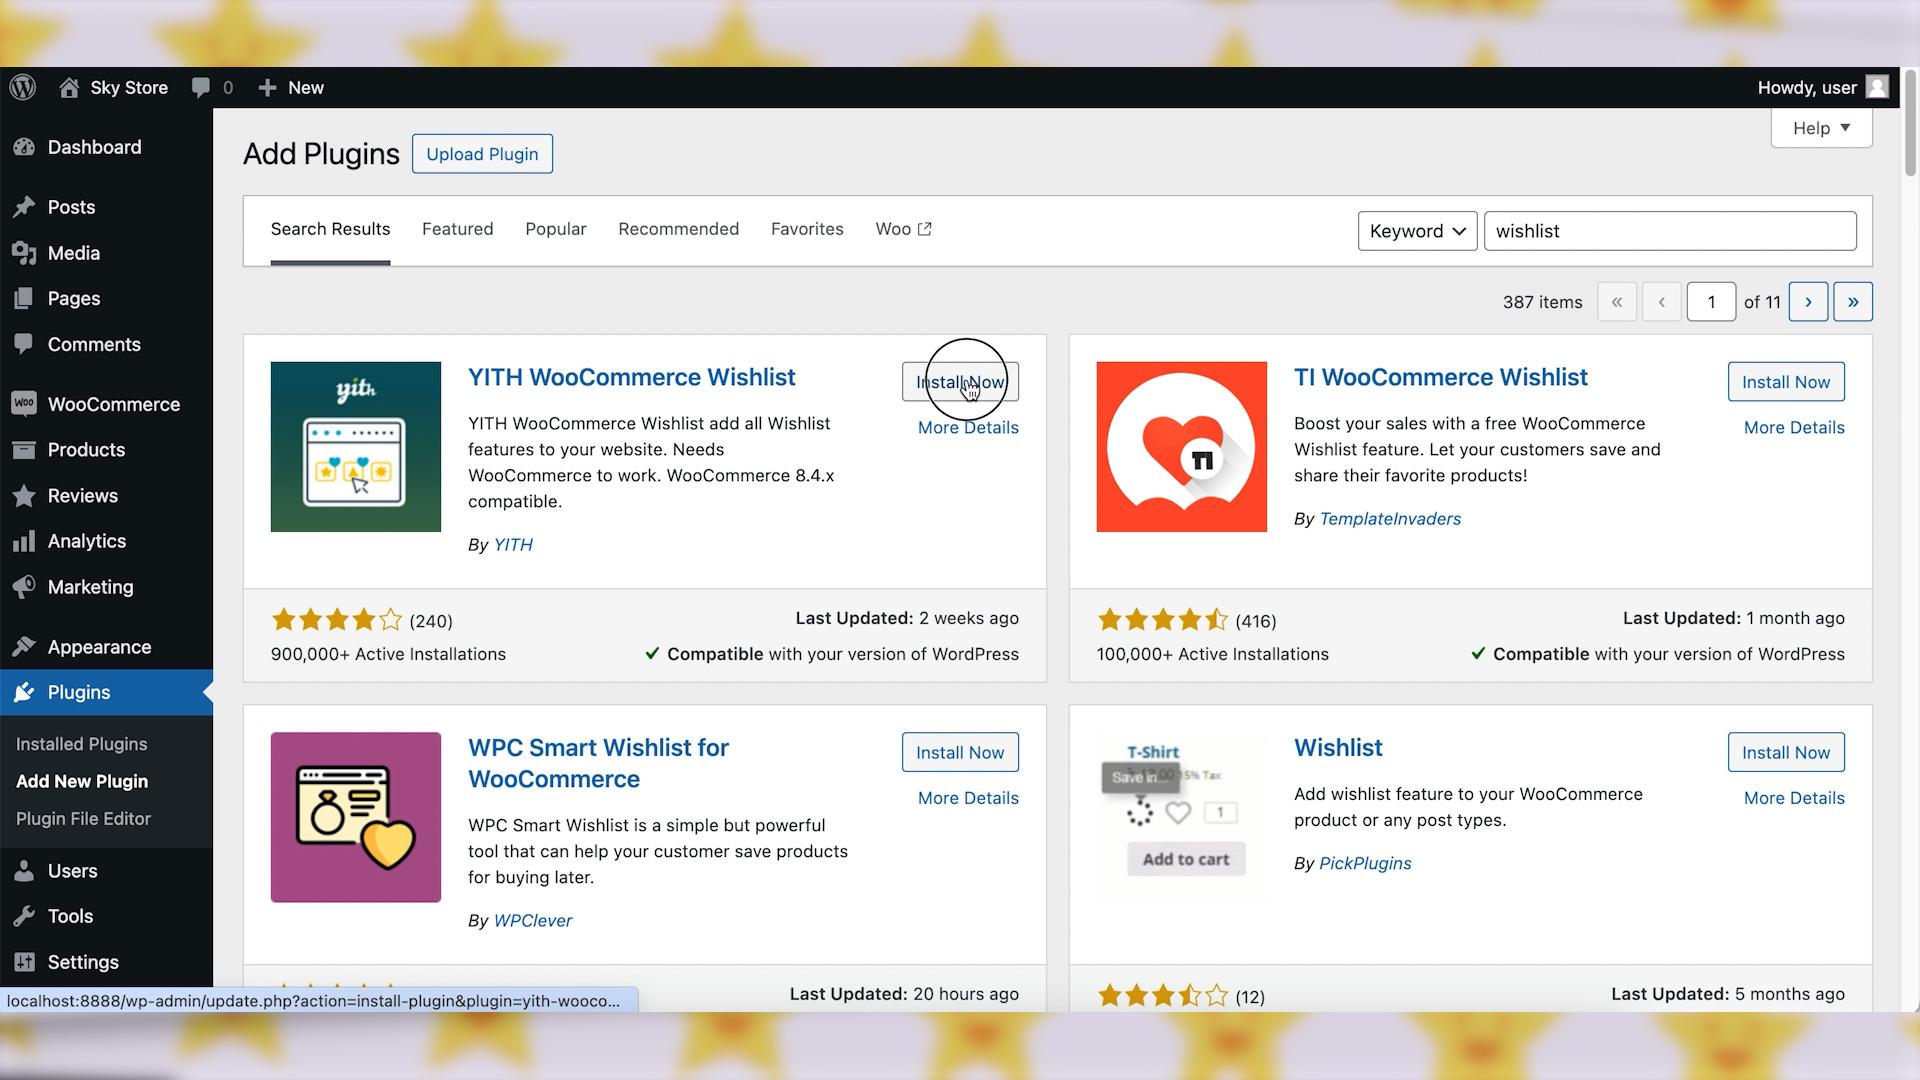
Step 2: Choose a Wishlist Plugin
For advanced wishlist functionality, consider using a dedicated WooCommerce wishlist plugin. Popular choices include “TI WooCommerce Wishlist” or “YITH WooCommerce Wishlist.” Install and activate your preferred wishlist plugin.
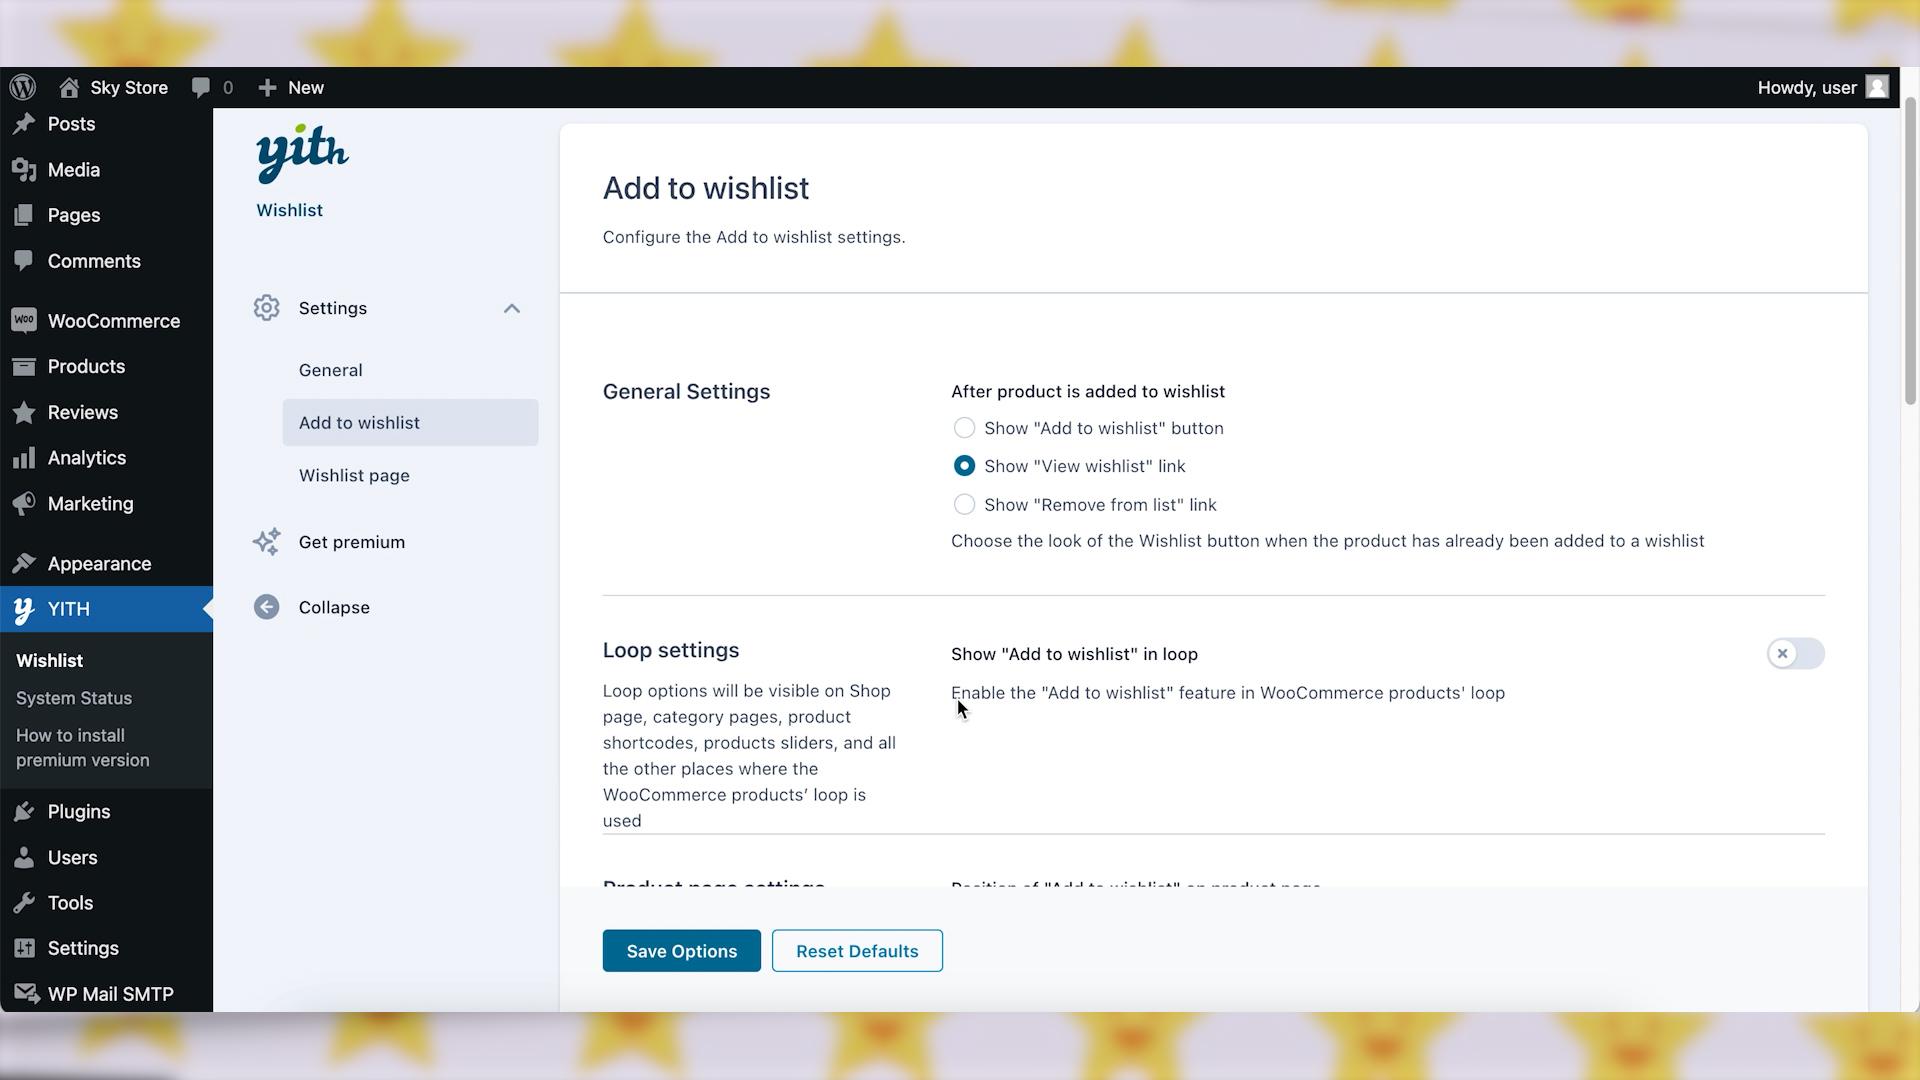
Step 3: Configure the Wishlist Plugin Settings
In the WordPress dashboard, go to “YITH”, then click on “Wishlist”.
Configure the Wishlist plugin settings, including the placement of the wishlist button, text customization, and visual appearance like style or colors.
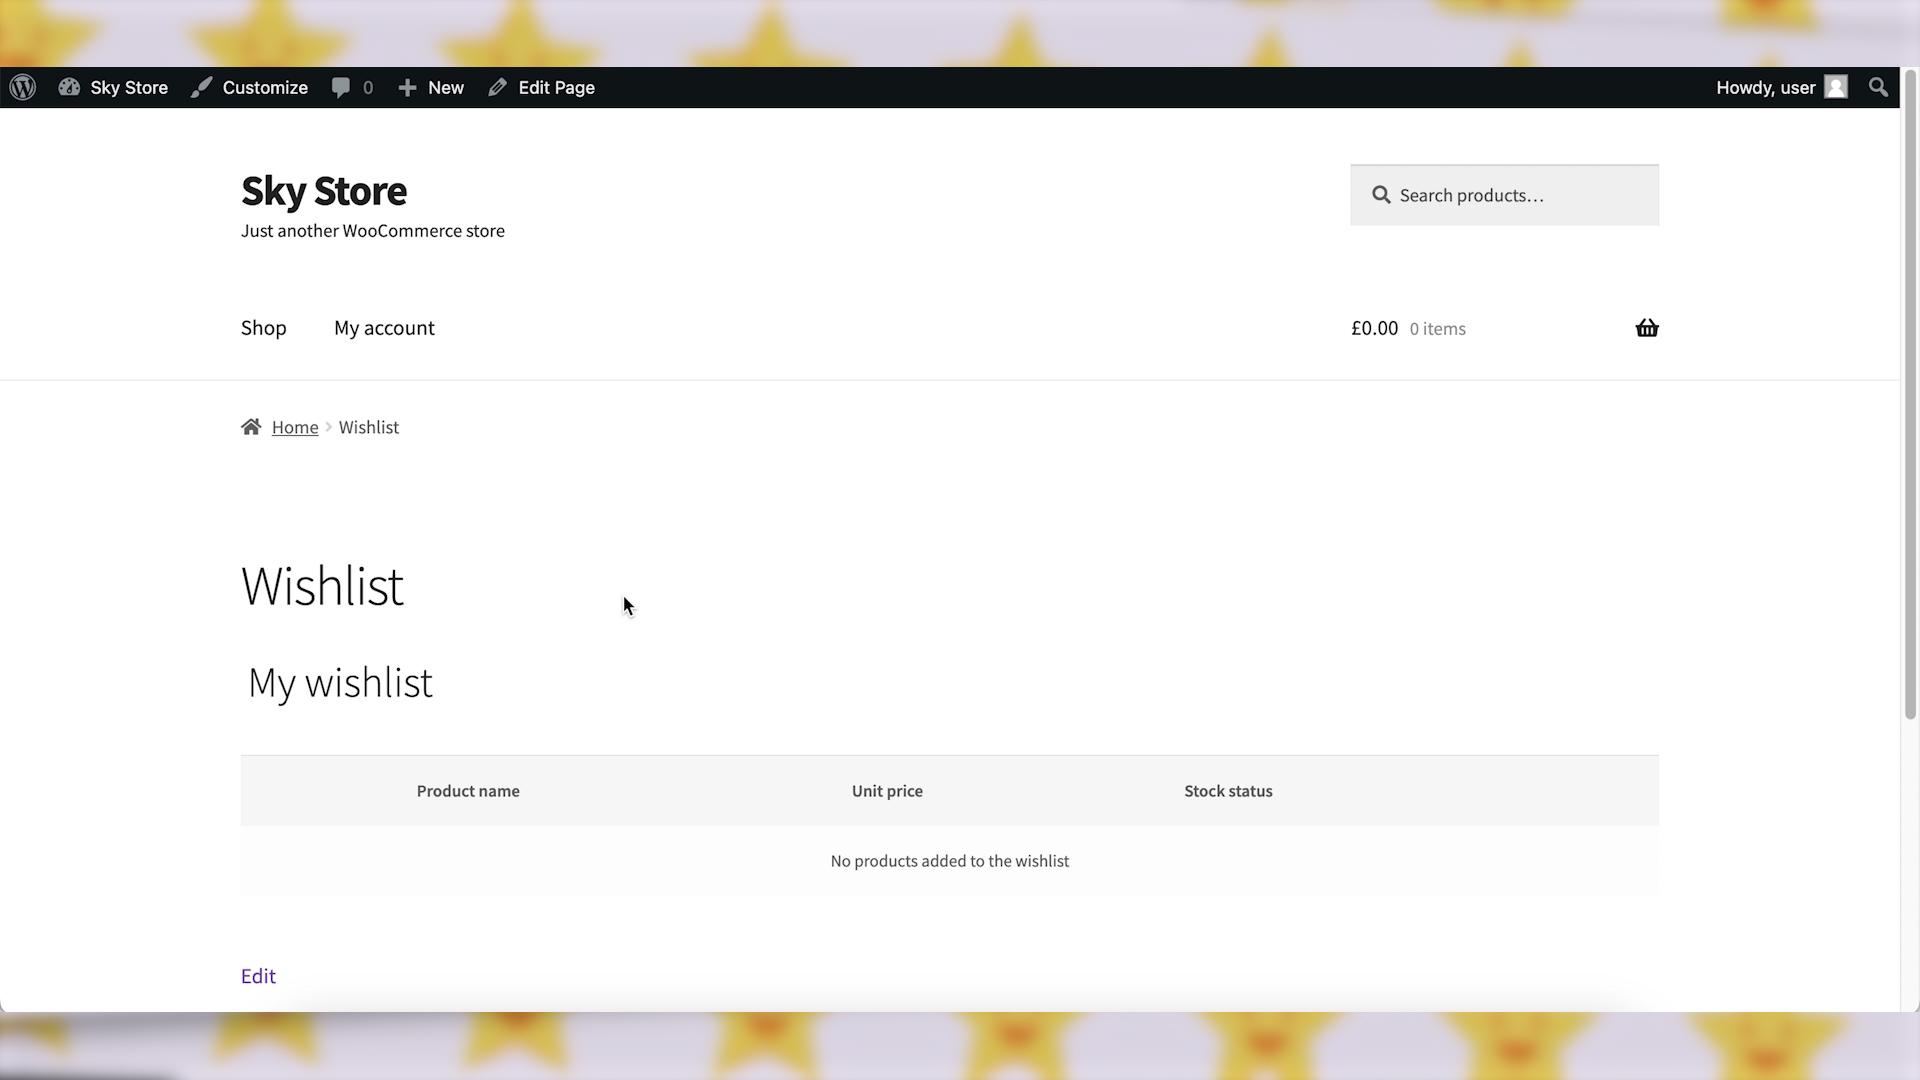
Step 4: Configure the Wishlist Page Settings
In the Wishlist plugin settings, there are options to configure the wishlist page. Normally, the plugin will automatically create a wishlist page for you when activated. If not, you might need to create a new page manually and assign it as the wishlist page in the plugin settings.
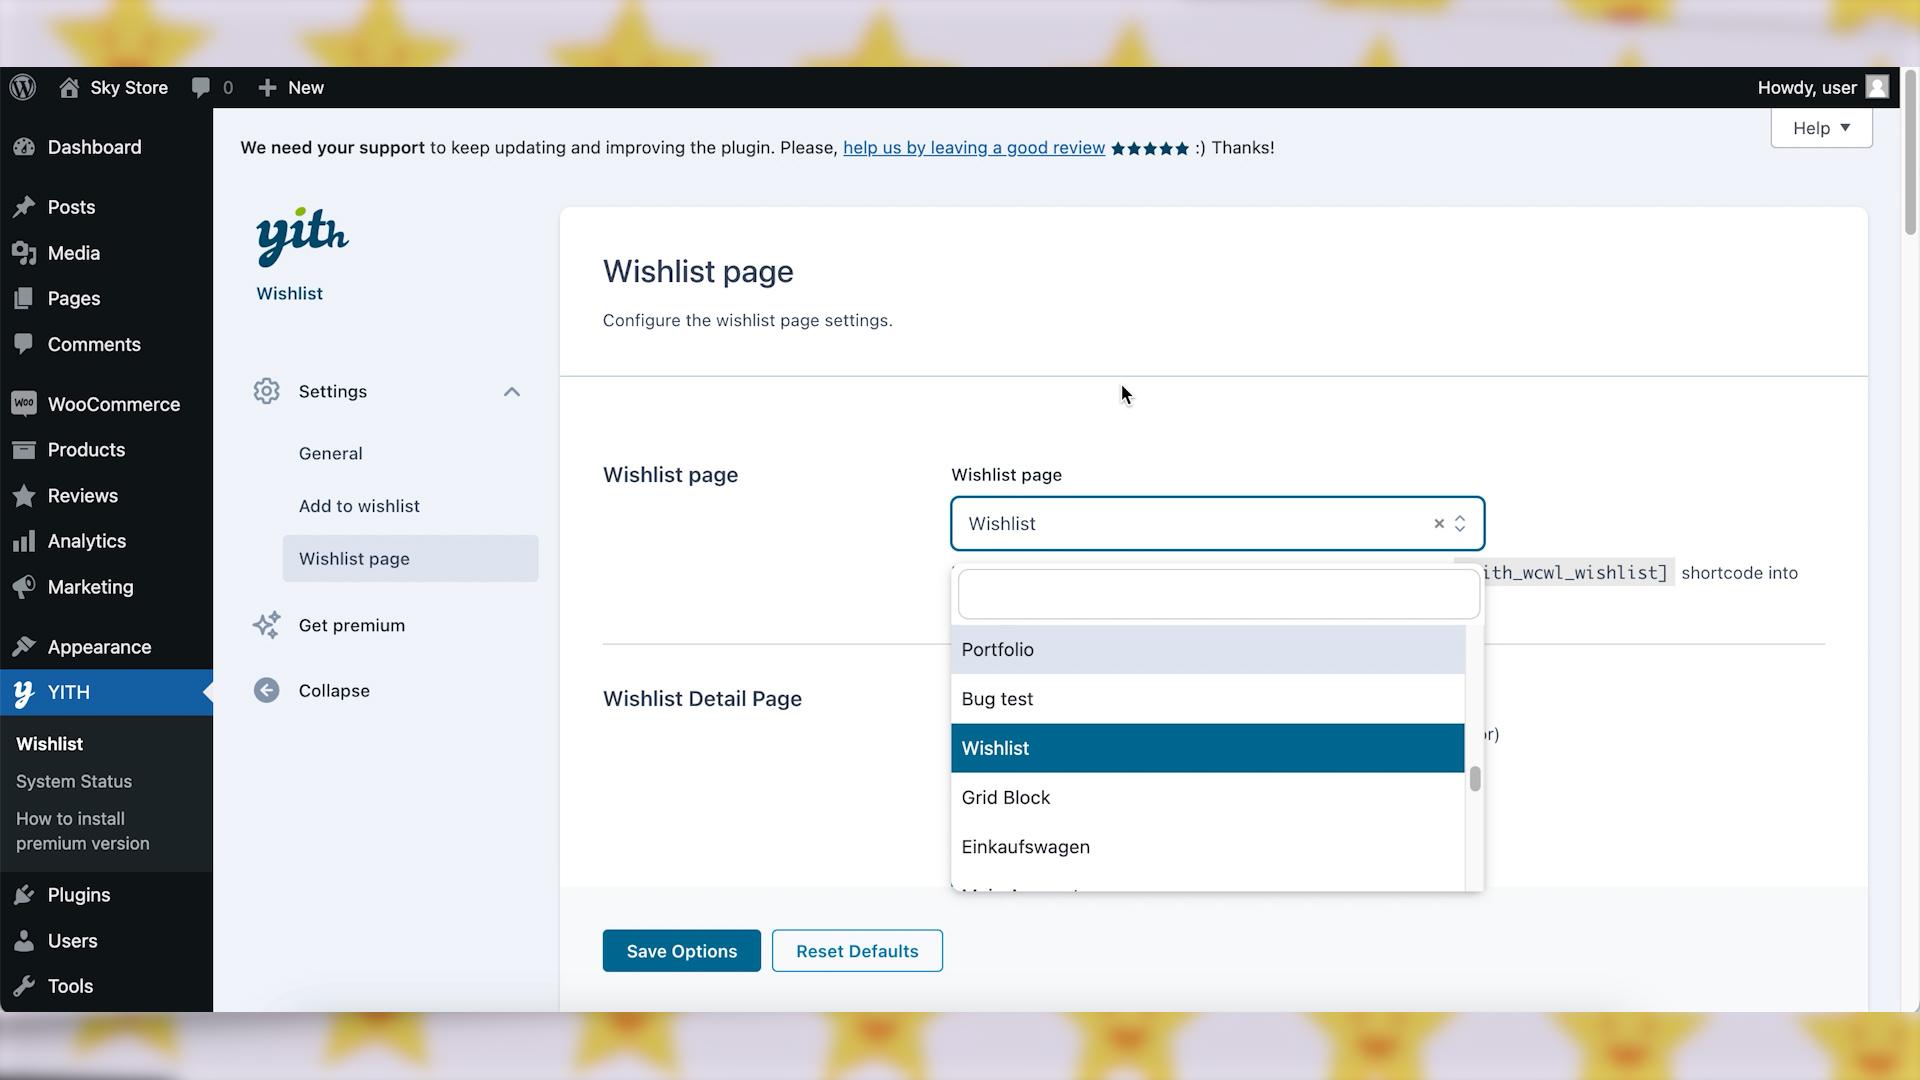
Please make sure that the wishlist page includes the shortcode that is mentioned in the settings.
There are a lot of settings for the wishlist page. You can configure what to show there, customize texts, style, and colors. It is also possible to add various buttons for sharing wishlists on social media.
When you are done with the customizations, don’t forget to save the settings.
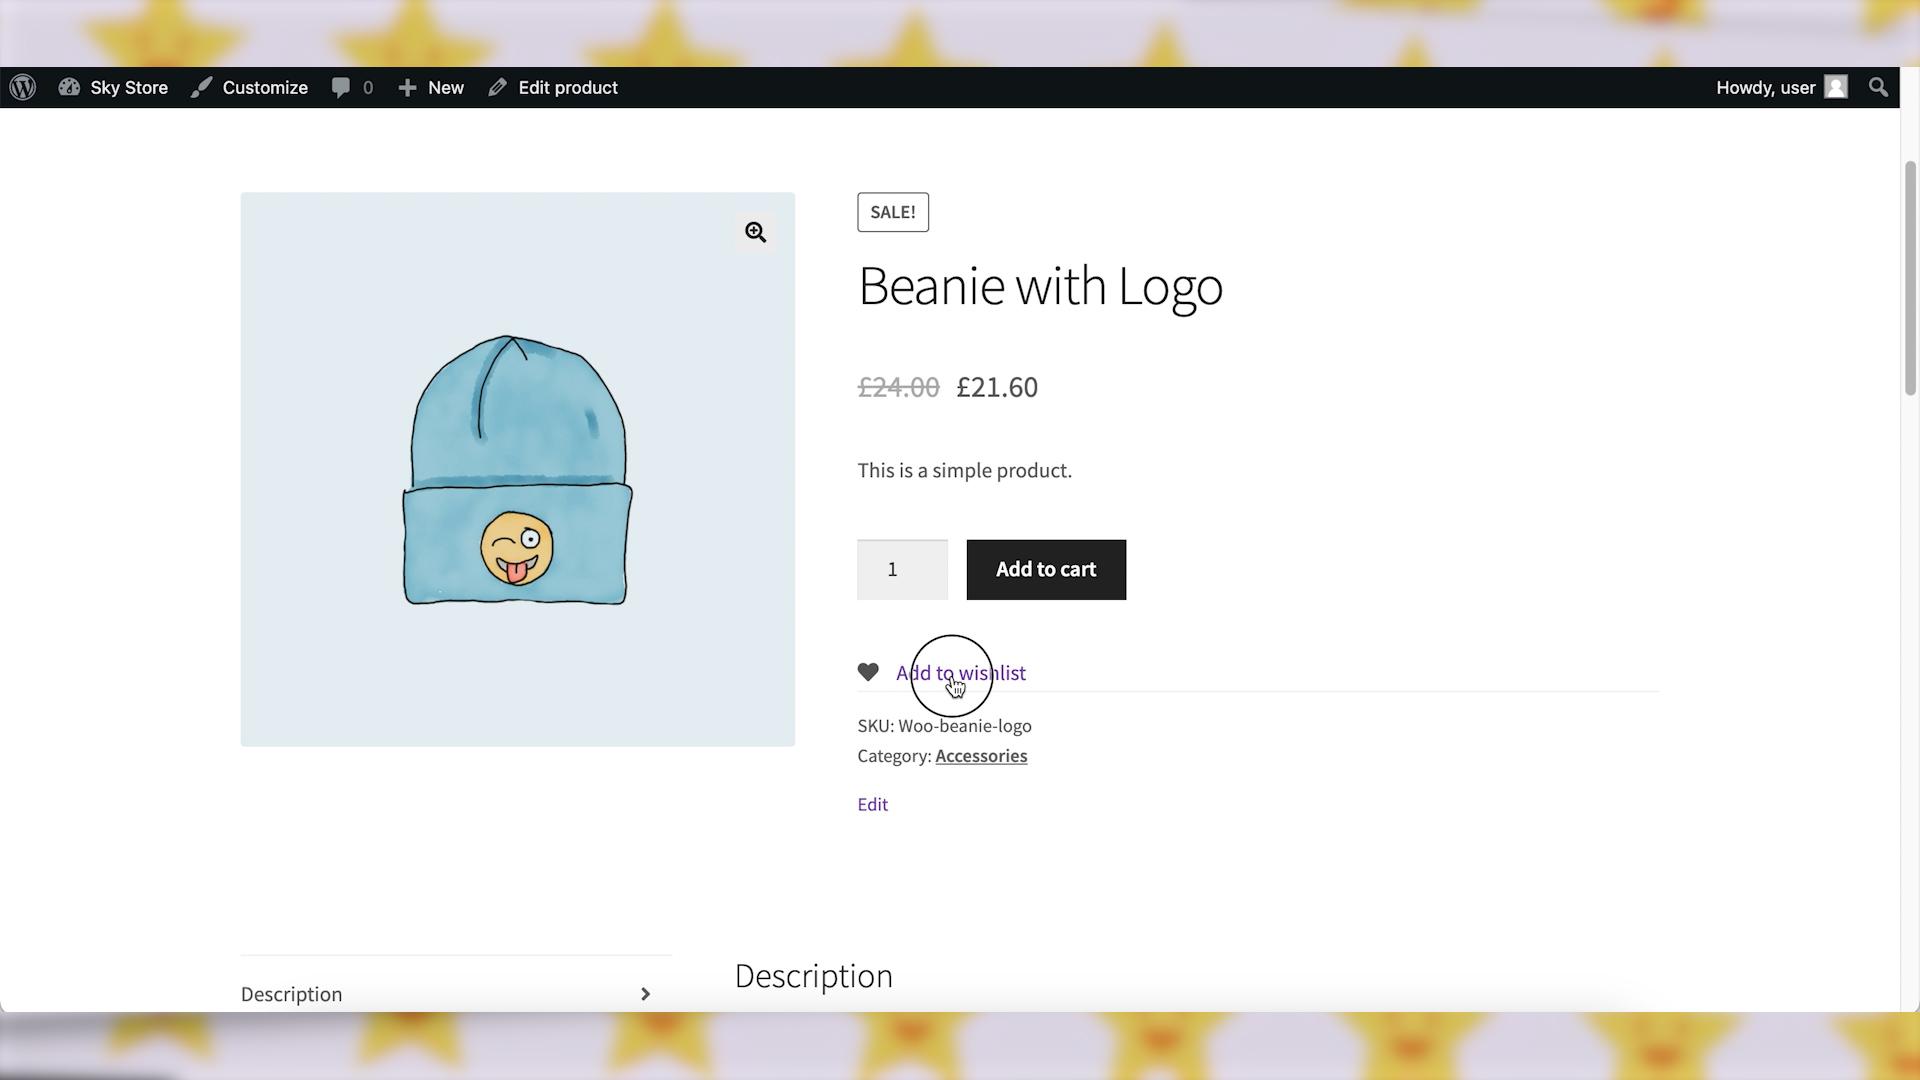
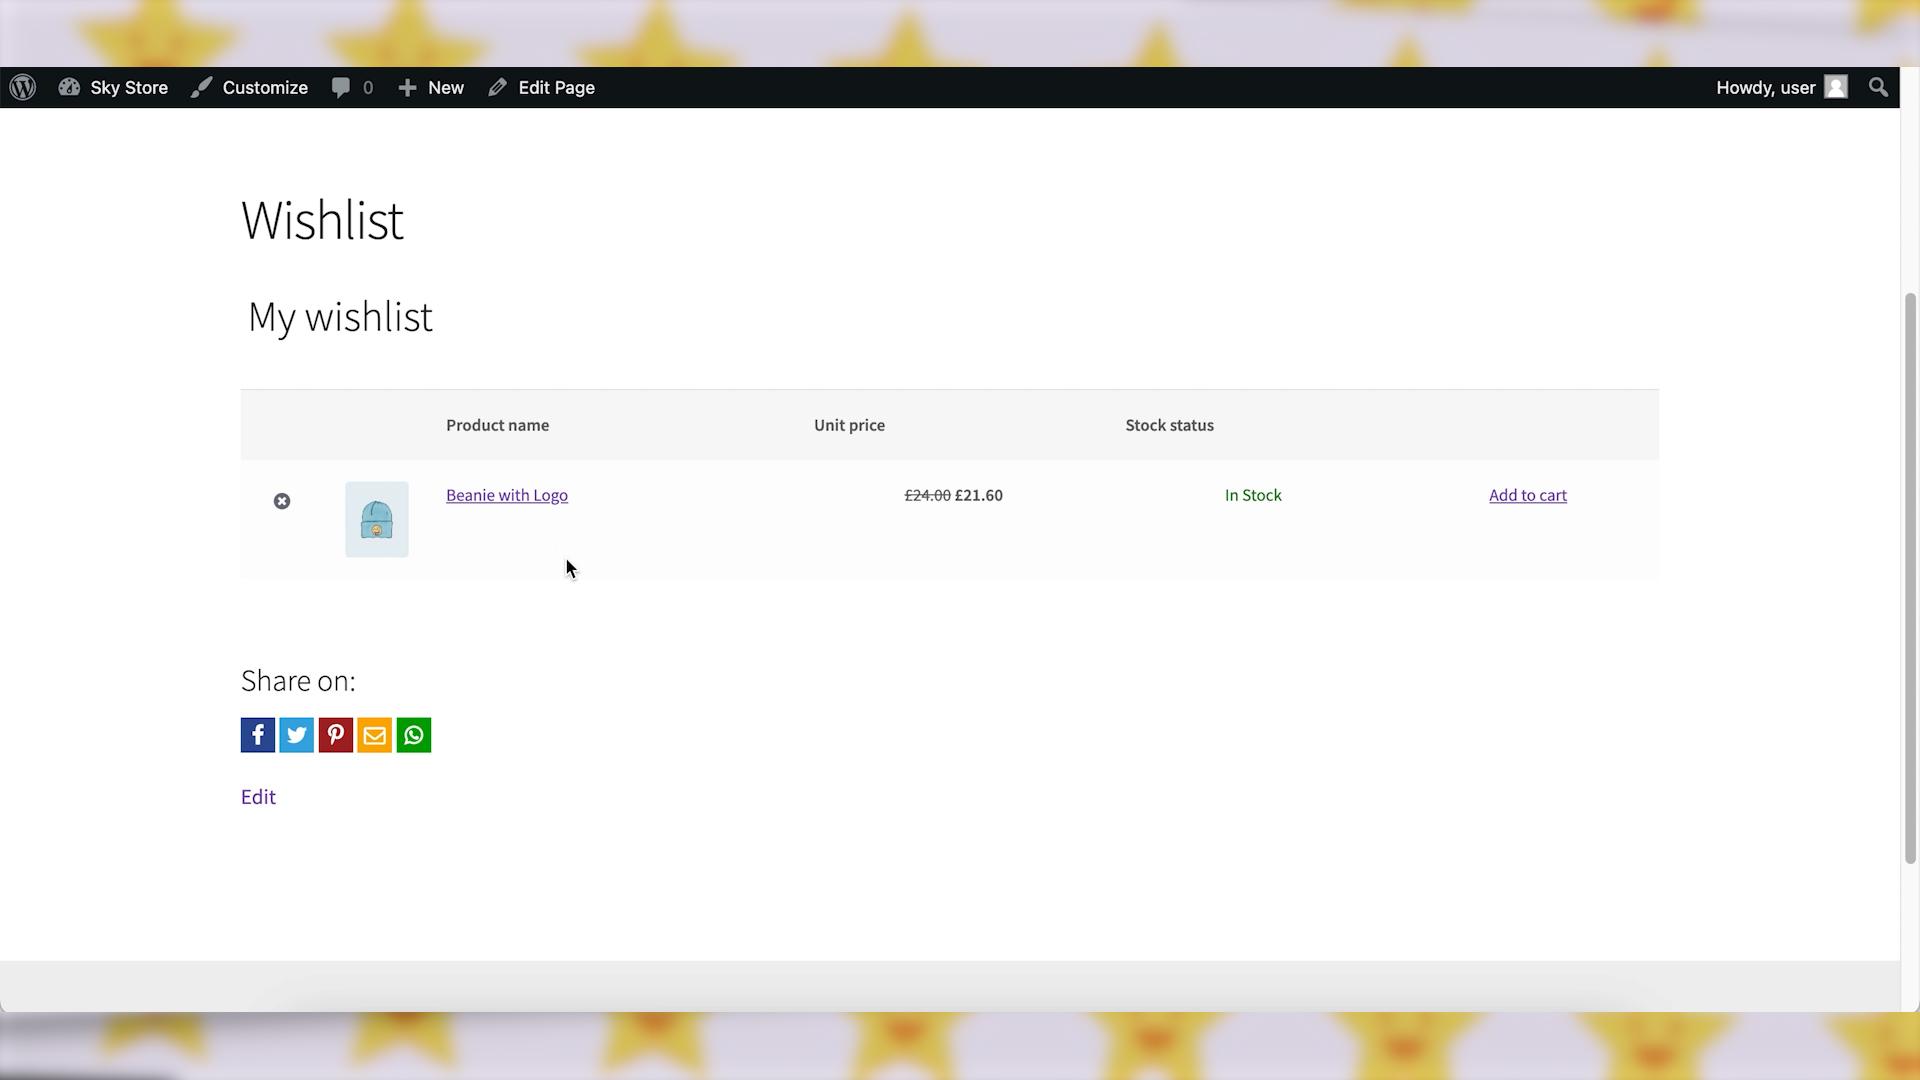
Step 5: Test the Wishlist Functionality
It is very important to test the wishlist functionality to ensure that products can be added and removed seamlessly.
Test the process from a customer’s perspective to ensure a user-friendly experience. Open a product page and try to add it to the wishlist. Then, open the wishlist page and verify that everything is displayed correctly.
Wrapping up
By implementing a wishlist feature in WooCommerce, you not only enhance the shopping experience for your customers but also gain valuable insights into their preferences. This can lead to increased customer satisfaction and improved sales. Happy selling!