
I have been doing a lot of research lately about building, styling, and authenticating HTML forms. All with accessibility in mind. And since I write about Woo on the Web, I thought to discuss something related to forms. But what?
I find that many people want to know how to add product enquiry forms to their shops, so let’s dive into that topic, shall we?
After looking up some of the existing ways to accomplish this, I found that I liked some ways, and didn’t like others.
I thought to demonstrate the approach I would take for myself or a client in this article for you today. In the end, you can send me comments if maybe you want me to take this further in a future article.

Table of Contents
- Approaches for Adding Forms to WooCommerce Product Pages
- Creating a Blank Plugin for Our Code
- Writing Custom Code for the Product Enquiry Form
Approaches for Adding Forms to WooCommerce Product Pages
The ability to add enquiry forms to product pages isn’t a new problem WooCommerce shopkeepers face. Let’s have a quick look at some of the ways this issue has been and is being tackled.
Some of the existing solutions will:
- have a link to a form popup on each product page
- link to another page on the site that houses the form
- embed a form within the product pages
There are some advantages and disadvantages to all approaches, like most things right?
For example, popups. Hmmm. I don’t know. Sure, it can reduce clutter on the page and give focus to the task at hand. And, you can be mobile-friendly with popups, but still. This isn’t the route I would go. Popups are often disliked by browsers of the Web.
How about keeping the form on a different page? Linking to another page on the site is an OK idea. In particular, if the form knows already what product the enquiry is about, then cool. It makes for a smarter solution. I think we can do better though.
What about embedding a form into each product page? This solution is more appealing to me, but it can have some flaws. For example, it could clutter the page. Also, does this solution suggest we must create separate forms for each product? Surely, we can provide a smarter solution than that. And we shall.
Reduce Clutter by Hiding the Form Behind a Tab

Did you know that the big Woo has a tabs API? I don’t know if that’s an official name, but, by default Woo provides some tabs on a product page, and we can hook into that functionality. We can remove tabs, edit them, or add our own.
The default Woo tabs include:
- Description (the tab open by default usually)
- Reviews
- Additional Information (this tab is present when the product
has_attributes(),has_dimensions(), orhas_weight())
Coolio. Now what? Well, we can tap into woocommerce_product_tabs and add our own tab! Clutter-free, non-popup form. Nice. Let’s do it.

We Won’t Reinvent the Wheel, But We Can Include Some of Our Own Code
Granted, there are solutions that exist to add new tabs to product pages in WooCommerce with a UI. I don’t know of any personally and I don’t care to look, but I am certain they exist.
Further, I imagine there are solutions that exist that will embed forms within these tabs. More than that, they probably let you create just one form, and have that auto-embed into the new tab. They likely even make it so the form is product-aware, which is an important detail.
Despite all that though, I thought it would be fun to do a lot of that ourselves. WordPress and WooCommerce exist. We aren’t going to reinvent those wheels. Contact form solutions exist. They will take care of email delivery, authentication, styling, and in some cases accessibility. Let’s leave that to them.
So, what is the project at hand today?
Today, we are going to:
- Write the code necessary to add a new tab to the product pages
- Use the free Contact Form 7 plugin for WordPress to create just one form that we can re-use
- Auto-embed our form into the new tab (for all products)
- Make it so the form knows what product the enquiry is about
Inquire, Enquire? What’s the Diff?

Let’s talk for a moment about the purpose of the form. Why even have it? This form is simply meant to allow visitors to enquire about a specific product in your Woo shop.
But, wait a moment. Is that inquire or enquire? Good question. One that I had as well. Searchers looking to solve this issue generally Google enquire. Google shows results for enquiring, even when inquire is searched. But what term is right?
Grammarly tells me that For the most part, you can use either enquire or inquire and not make a mistake
. Regardless of that though, the Grammarly Chrome extension keeps trying to correct my use of enquiry as inquiry. I digress.
We’re going to add an enquiry form that may also be used for inquiries. How about that?
Creating a Basic Plugin for Our Code
We need to write some code. But where on Earth do we add it? There are a few different options for this, but I feel that only two of them are correct.
You certainly do not want to override the core functionality of WordPress or WooCommerce by editing core files. Future updates to those softwares will overwrite your work.
The same goes for the WooCommerce theme in use, whether using Storefront or some other theme. If you add custom code to the functions.php file for the theme, future theme updates will wipe out the code.

Add Code to a Custom Plugin or Child Theme?
A much safer approach is to add the code to the functions.php of a child theme if one is being used. Many times, a Woo or WordPress theme behaves more like a framework. The author keeps it up-to-date with slick functionality. And although the theme may look decent style-wise, the style (and in some cases functionality) can be overridden with a child theme.
It is debatable whether custom functionality should be added to a child theme or a custom plugin. I personally opt for a plugin the majority of the time. However, there is a logical way to look at it.
Can the custom functions work with a different theme? If yes, make it a plugin. So, given that this boolean results in True for us today, a plugin we shall create.
Add a Basic Empty Plugin to WordPress
I know. My explanations of things are verbose. Long-winded you may call it. Thorough would be a more kind explanation 🙂
I will get into the code very soon, promise. First, let’s get a blank plugin setup.
Pluginception – A Plugin to Create Plugins
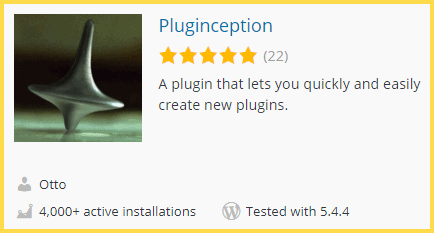
You could use Pluginception to quickly create a plugin.
You can call it what you want, and the files are created automatically.
After using Pluginception, you can then edit your new plugin within the WordPress Dashboard by copying code to it. I won’t explain how to use Pluginception today though because I am going to go a different route. You can still follow along either way.
My Approach to Creating Small Plugins
What I am going to do is create a folder on my computer, and create a blank file of the same name to go inside it. I will then add the code into the file using Visual Studio Code. Any plain text editor should do the trick though.
Up to you, but after that, you can zip the files up and install the plugin through the WordPress Dashboard. I am going to skip the zip and just use SFTP to upload the folder to /wp-content/plugins/. I will leave the approach you take to you. How long-winded do you want me to be? 😀
Writing Custom Code for the Product Enquiry Form
- Code to Add Custom Woo Tab
- Code to Change Woo Tab Order
- Install the Contact Form 7 Plugin
- Add a Contact Form to Our New Woo Tab
- Create a Default Subject Using the Product Name
We have to make sure the plugin name is unique across the globe. The folder name and file name probably should share the same name as each other too.
Mostly, the prefix for the folder and filename is derived from a unique acronym. My name is Keith Lock, so I will use kl as the prefix. I will use a long name to avoid clashes.
Plugin name: Woo Product Enquiry Form
Folder/File name: kl_woo_product_enquiry_form_in_new_tab
Be sure that the filename has a .php extension.
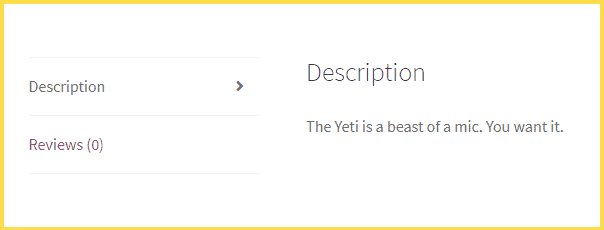
Above is a screenshot with the default look for the tabs before adding a new one. If you’re wondering, the reason that the Additional Information tab isn’t present is that the product being viewed doesn’t have any of those settings defined: weight, attributes, or dimensions.
The starter code is below. You don’t have to add it just yet. There will be a full version near the end.
Code to Add Custom Woo Tab
<?php
/**
Plugin Name: Woo Product Enquiry Form
**/

function kl_woo_new_product_tab( $tabs ) {

  $name_for_new_tab = "enquiry_form";
  $title_for_new_tab = "Questions about this Product?";

  $tabs[$name_for_new_tab] = array(
    'title' => __( $title_for_new_tab, 'woocommerce' ),
    'priority' => 50,
    'callback' => 'kl_woo_new_product_enquiry_form'
  );

  return $tabs;

}
add_filter( 'woocommerce_product_tabs', 'kl_woo_new_product_tab', 98 );

function kl_woo_new_product_enquiry_form() {
  echo "Hello World!";
}
?>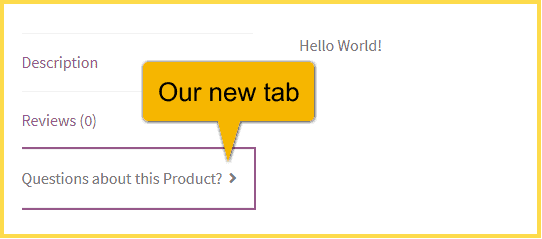
Above is our new WooCommerce tab which simply has “Hello World” written to it.
As you may have noticed in the code, we set a priority for the new tab. This determines where it gets placed on the product page. We used a higher number to move it near the end. You can, if desired, change the priority of all tabs to produce a custom order.
If you want to do that, you can modify the code like below.
Code to Change Woo Tab Order
<?php
/**
Plugin Name: Woo Product Enquiry Form
**/

function kl_woo_new_product_tab( $tabs ) {

  $name_for_new_tab = "enquiry_form";
  $title_for_new_tab = "Questions about this Product?";

  $tabs[$name_for_new_tab] = array(
    'title' => __( $title_for_new_tab, 'woocommerce' ),
    'priority' => 15,
    'callback' => 'kl_woo_new_product_enquiry_form'
  );

  $tabs['reviews']['priority'] = 10;
  $tabs['description']['priority'] = 20;

  // only if the 'Additional Information' tab is present
  global $product;
  if ( $product->has_attributes() || $product->has_dimensions() || $product->has_weight() ) {
    $tabs['additional_information']['priority'] = 25;
  }

  return $tabs;

}
add_filter( 'woocommerce_product_tabs', 'kl_woo_new_product_tab', 98 );

function kl_woo_new_product_enquiry_form( $tabs ) {
  echo "Hello World!";
}
?>
I am going to remove the code that changes tab priority moving forward. I just wanted to show you what’s possible.
Install the Contact Form 7 Plugin
If not already installed, let’s get the Contact Form 7 plugin added to your site. It’s a free form submissions plugin for WordPress and the one that we will use for the product enquiry form.
- In your WordPress Dashboard, go to Plugins
- Click the Add New button near the top
- On the right side type contact form 7 in the Keyword search box
- Click the Install Now button on the Contact Form 7 installation screen
- Click the Activate button that shows up in place of the Install Now button
You will then be redirected to the Plugins screen. From there you can optionally click the Enable auto-updates link at the right side below where it says Automatic Updates.
Add a Contact Form to Our New Woo Tab
Contact Form 7 will automatically create a form for you. You can see it after clicking Contact on the left side of the WordPress Dashboard. It’ll be called Contact form 1. You may hover over the name and click the Edit link, then edit the form to suit your fancy.
What we care about at present is the Shortcode that you will see next to the form name. By default the shortcode will be something like:
[contact-form-7 id="16" title="Contact form 1"]
Your ID will almost certainly be different. This is the ID that WordPress assigns to new posts, and custom posts (for which forms are). The ID is unique and is incremented sequentially. I don’t have many pages, posts, or products in my test shop so the ID is lower in my case.
Be certain that you use the shortcode that you have in your Dashboard. Also, it’s best to change the title to something more appropriate.
In the code, you will want to change the echo "Hello World!"; line with something like the following:
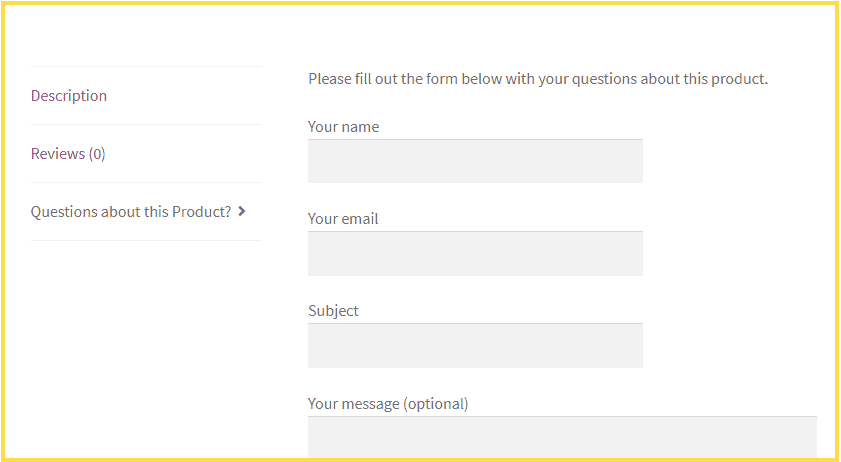
echo "<p>Please fill out the form below with your questions about this product.</p>" . do_shortcode( '[contact-form-7 id="16" title="Product Enquiry Form"]' );You may instead add the Please fill out the form below with your questions about this product. line to the Form section when editing your form in the Contact Form 7 interface. Also, be sure to paste in your own Shortcode between the single quotes in the code above.
This will result in something like the screenshot below.
Create a Default Subject Using the Product Name
The above may be good enough for you, and it is certainly pretty decent. You have a tucked away form that is only present when the tab is clicked. Also, it’s not a popup. Plus, you only have to manage one form regardless of the number of products that you have.
But, wouldn’t it be even awesomer if the Subject line contained the name of the product? Why yes it would. Let’s explore how.
- First step, go back to the edit screen for the form.
- In the Form tab (the default tab), look for the Subject field.
- Change it to be
[text* your-subject default:shortcode_attr]. Basically, we addeddefault:shortcode_attrin there. Click Save. - Now, edit the shortcode for the form itself. Remember, it won’t be exactly like mine, but something like
[contact-form-7 id="16" title="Product Enquiry Form" your-subject=""].your-subject=""is the new bit. See how it matches up with the field name we want to add the data to? Keep that in mind if you are doing this for a different field other than Subject. - Copy the new shortcode to the code for the plugin.
If you save and test right now, assuming no errors, nothing will be different in the form. Before it will work we have to register this new attribute by writing some code.
Below is the new function to add:
function kl_custom_product_name_atts_wpcf7( $out, $pairs, $atts ) {
  $my_attr = 'your-subject'; // matches the field name
  global $product;
  $product_name  = $product->get_name();
  $out[$my_attr] = $product_name;
  return $out;
}
add_filter( 'shortcode_atts_wpcf7', 'kl_custom_product_name_atts_wpcf7', 10, 3 );
After adding that you will get something like this:
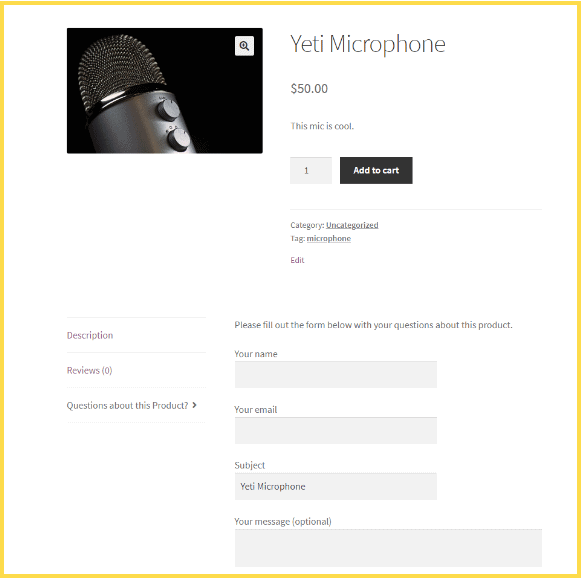
Of course, I could have typed in that subject line before taking the screenshot but I didn’t. Promise. Try the code to see for yourself.
The full plugin code is below minus the parts that customize the tab order.
<?php
/**
Plugin Name: Woo Product Enquiry Form
**/

function kl_woo_new_product_tab( $tabs ) {

  $name_for_new_tab = "enquiry_form";
  $title_for_new_tab = "Questions about this Product?";

  $tabs[$name_for_new_tab] = array(
    'title' => __( $title_for_new_tab, 'woocommerce' ),
    'priority' => 50,
    'callback' => 'kl_woo_new_product_enquiry_form'
  );

  return $tabs;

}
add_filter( 'woocommerce_product_tabs', 'kl_woo_new_product_tab', 98 );

function kl_woo_new_product_enquiry_form() {
  echo "<p>Please fill out the form below with your questions about this product.</p>" . do_shortcode( '[contact-form-7 id="16" title="Product Enquiry Form" your-subject="hi"]' );
}

function kl_custom_product_name_atts_wpcf7( $out, $pairs, $atts ) {
  $my_attr = 'your-subject'; // matches the field name
  global $product;
  $product_name  = $product->get_name();
  $out[$my_attr] = $product_name;
  return $out;
}
add_filter( 'shortcode_atts_wpcf7', 'kl_custom_product_name_atts_wpcf7', 10, 3 );
?>
For sure this can all be refactored and improved upon. If you have ideas on additional features that you would like to see added, comment below. Perhaps they will make their way into version 2.
Happy shopkeeping. Woo forward!